Submission Center Setup and Settings
Modified on: Sun, 26 Oct, 2025 at 5:35 PM
Requirements
|
The Submission Center is designed to help track and organize commercial submissions to carriers where automation does not exist or is limited. The Submission Center is meant to guide you through the submission process with focused communications, documents, and tasks.
In this article, we cover the settings or preferences an Agency Admin can setup in Submission Center for their agency. An Agency Admin can configure preferred carriers, add underwriters for quick selection, notate carrier attachment preferences, confirm the "without quote" threshold for prioritization, and choose an email template for smoother bulk submitting.
| TABLE OF CONTENTS | Check out our video if you want to watch and follow along!  |
 | Did you know? - You can click on the images in our articles to zoom in! |
Accessing Submission Center Settings
To access the Submission Center Settings, you must be an Admin at your agency and have access to the Submission Center product. To tell if you have the right permissions:
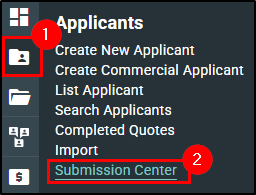
1. Hover over the Application icon (closed folder) on the left navigation bar.
2. Choose Submission Center. If you do not see this option you do not have access to Submission Center.
3. Confirm you can see the Carriers tab and the Settings & Thresholds tab. If you do not see these tabs, you do not have Admin access.
If you do not have the correct permissions, please reach out to your Agency Admin for assistance. Agency Admins, please reach out to support@ezlynx.com for assistance.
 |  |
Carriers
To make sure everything is setup for Submission Center you'll want to go through each of these options for your carriers you'll be submitting Commercial Submissions to. From the Carriers tab, you can:
- Select which carriers are the preferred options
- Add Underwriter information
- Set Attachment Preferences
- Notate which carriers are provided by a Network or Market Access Provider.
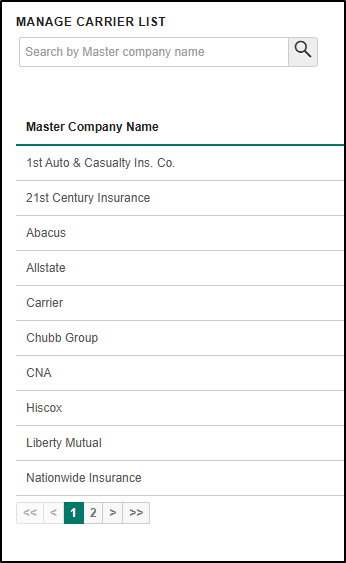
The carriers that are displayed here are pulled from the Carriers/Markets list found under the Settings icon (gear) on the left navigation bar. If you do not see a carrier on the Submission Center list, first check the Manage Carriers/Markets page to make sure it's listed there.
 |  |  |
Preferred Carriers
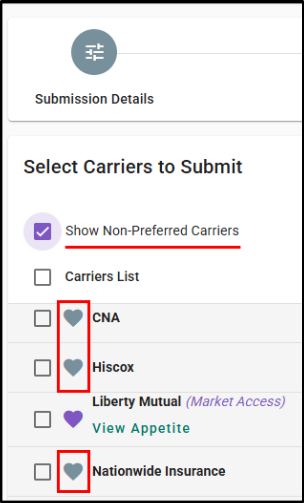
To make carrier selection easier during the commercial submission process, it's recommend to mark which carriers are preferred for submissions. To mark a carrier as preferred for commercial submissions:
1. Select the Heart icon next to the carrier so it's filled in
OR
2. Click on the carrier and then toggle the "Preferred carrier for Submission" option.

Even if the carrier is not marked as preferred, it is still an option during the submission process by checking the "Show Non-preferred Carriers" box during the submission process.
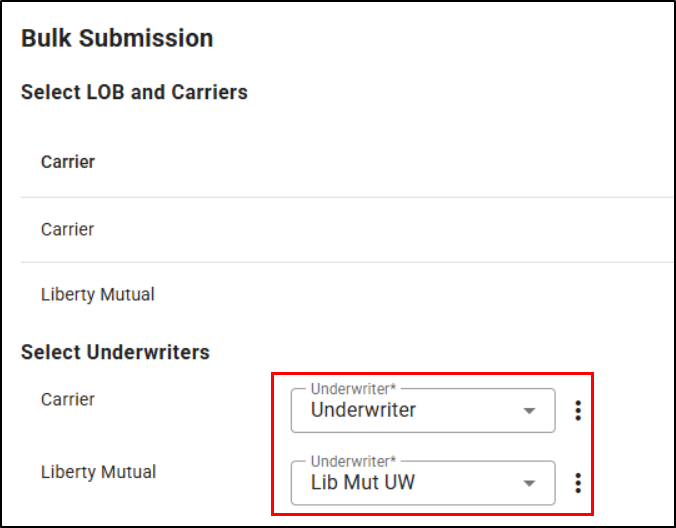
Underwriter information
To add an Underwriter(s) to a carrier for quick selection during the commercial submission process, you can add them to each carrier here under the Carriers tab. To add an underwriter for a commercial submission:
1. Select the carrier you want to add the underwriter to.
2. Select the Add underwriter button. This will open the Add underwriter window.

3. Input the required information and then select Save. This will close the window and you'll see the underwriter in the table.

 | Attention! - When adding a phone number or cell number on the Add Underwriter window, add only the numbers. The system will format the numbers after you Save. |
To edit or remove an underwriter, select the More Actions icon (vertical ellipses), and choose Edit or Delete.
- Edit will open the Edit Underwriter window where you can edit the info.
- Delete will open a confirmation window for you to confirm you want to delete the underwriter from this carrier.

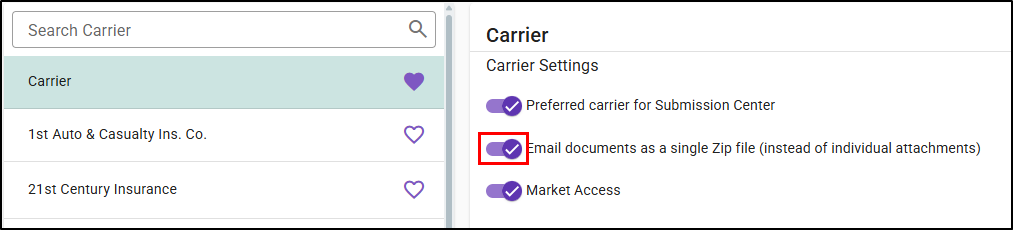
Carrier Attachment Preferences
During the submission process, you'll be submitting various documents. If a carrier prefers to have all the documents emailed as a zip file rather than individual attachments you can toggle the "Email Documents as a single Zip file (instead of individual attachments)" option. If this option is off then when you submit the files to the carrier they will be attached to the email individually.
Market Access
If you have certain carriers that are provided to you via Networks or Market Access Providers, you can let know by toggling the "Market Access" option. When this option is on, there will be a callout next to the carrier during the submission process.
 |  |
Settings & Thresholds
To make sure everything is setup for Submission Center you'll want to check the threshold dates EZLynx will consider a submission "without a quote" and select which Email Template you'd like your agency to use for Bulk Submissions for quick turn around.
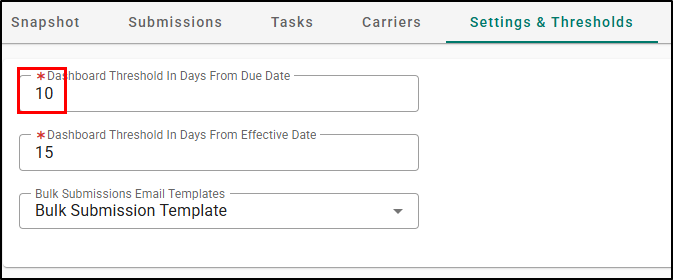
Thresholds
The Due Date and Effective Date Thresholds are used to check when a submission is considered "without a quote" and needs to prioritized.
- The Due Date Threshold is when all submissions that are in the status of Open or Submitted will be counted.
- The Effective Date Threshold is when all submissions that are not in the status of Declined, Not Sold, or Bound will be counted.
To update the threshold:
1. Type in the new number of days.
2. The change will be auto saved which you can confirm by the notification that briefly displays in the bottom-right corner.
 |  |  |
Bulk Email Template
During the submission process, your agents will be able to bulk submit to carriers. To make the bulk process smoother, it's recommended to select an email template that will pre-fill for them to use as the base of the email to all carriers.
To select the bulk email template:
1. Use the Bulk Submissions Email Templates dropdown to choose from the list of Email Templates your agency has.
2. The change will be auto saved which you can confirm by the notification that briefly displays in the bottom-right corner.
The Bulk Submissions Email Template dropdown list is populated from your agencies Email Campaign Templates page. If you do not see the template you'd like to select, first check your Email Campaign Template list.
 |  |  |
We hope this workflow article was able to help you setup your Submission Center preferences for your agency. Please let us know if this article was helpful by answering the question below. Check out our related articles on the right-side of the page to learn more about EZLynx!
Did you find it helpful? Yes No
Send feedback