Working Commercial Submissions
Modified on: Thu, 15 Jan, 2026 at 7:09 PM
Requirements:
|
This article covers how to work or update commercial submissions using Submission Center. Finding submissions, tracking what step each submission is at, creating proposals or agreements, viewing activities, and documenting wins vs. losses are all topics we'll cover in this article.
| TABLE OF CONTENTS | Check out our video if you'd like to watch and follow along!  |
 | Did you know? - You can click on the images in our articles to zoom in! |
Accessing Submissions
You can find commercial submissions in two different spots:
- Customer's Submissions tab
OR - Submission Center's Submissions tab
The difference is between the two is viewing submissions from a customer's account means you will only see that customer's submissions.
While viewing submissions from the Submission Center means you will be able to see all submission for your agency.
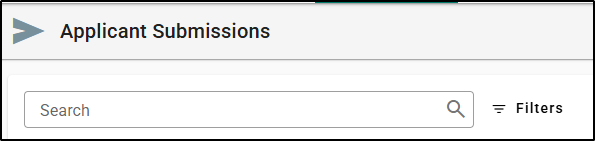
To view only a customer's submissions:
1. Navigate to a Commercial Applicant.
2. Select the Submissions tab.

To view all submissions for your agency:
1. Hover over the Application icon (closed folder) on the left navigation bar.
2. Choose Submission Center.
3. Select the Submissions tab.
 | 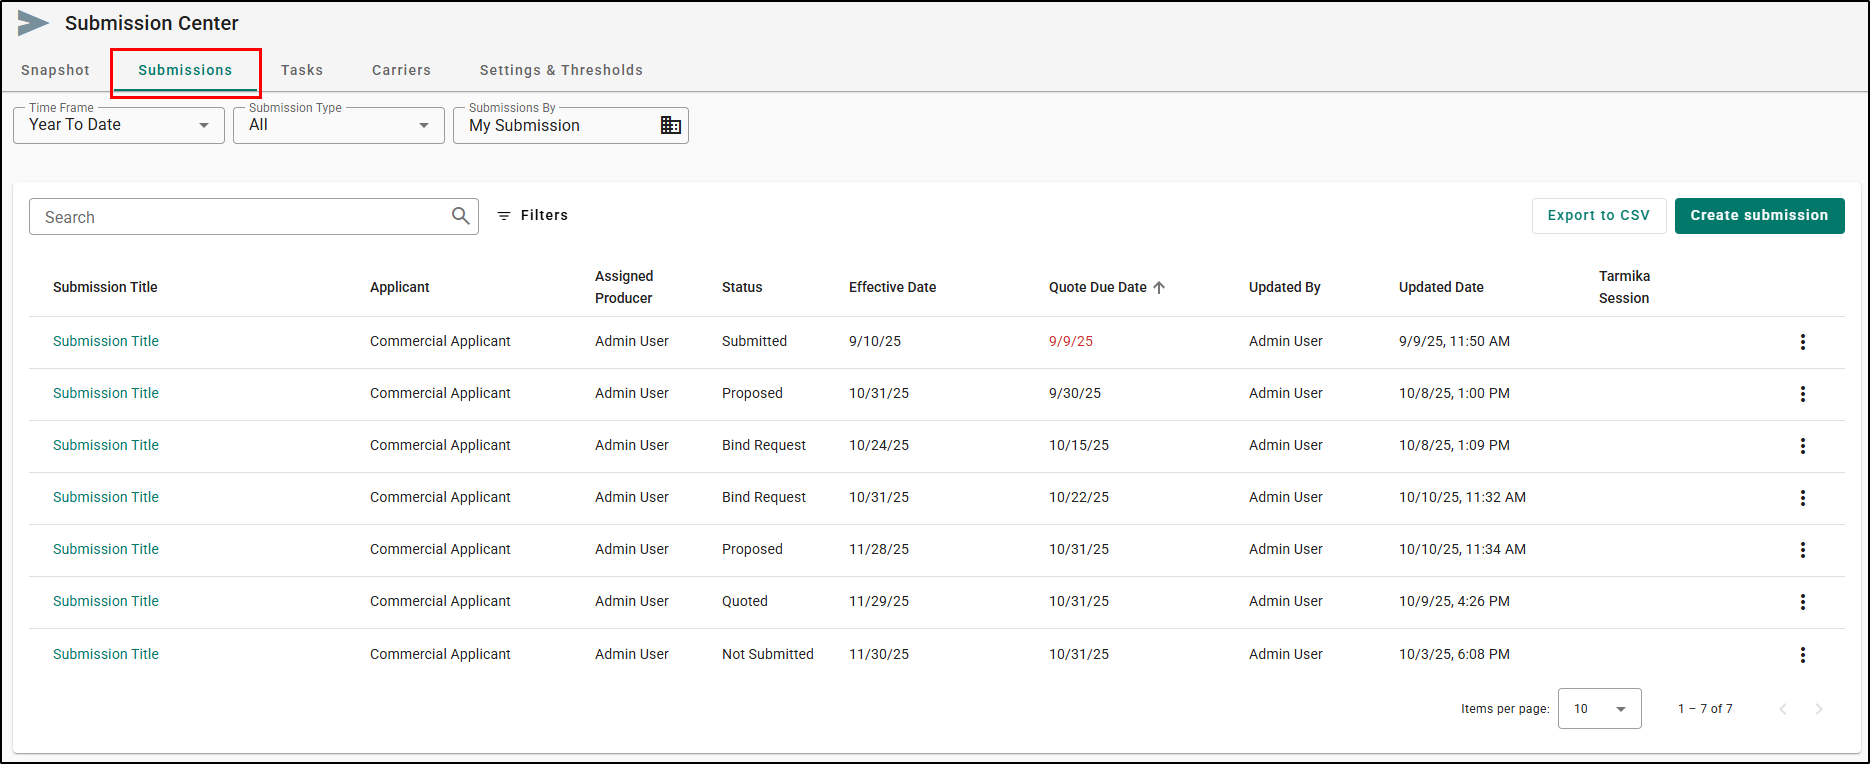 |
Regardless of which path you take, you can access the Submission's details page by clicking the Submission Title link.
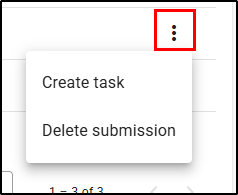
Also, the actions under the More Actions icon (vertical ellipses) are the same on either page. They are Create Task and Delete Submission. More on creating tasks later in this article.
 |  |
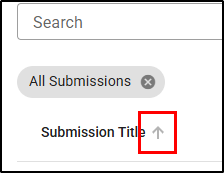
As always you can also use the Search bar or Filters to find a specific submission. If you select a column header on either page, you can also sort the table of submissions.
 |  |
Tracking Status Changes
As you hear back from carriers about the submissions you submitted, you'll want to update the status of the submissions.
There are three ways you can track the status of a submission
- Status of a specific LOB for a carrier
- Status of a specific carrier
- Status of the entire submission
 | Attention! - Several statuses will ask for additional information to understand the precise disposition of the submission. For example, when choosing Quoted, a required Premium Field will display. Make sure you fill out all required fields or the status change will not save. |
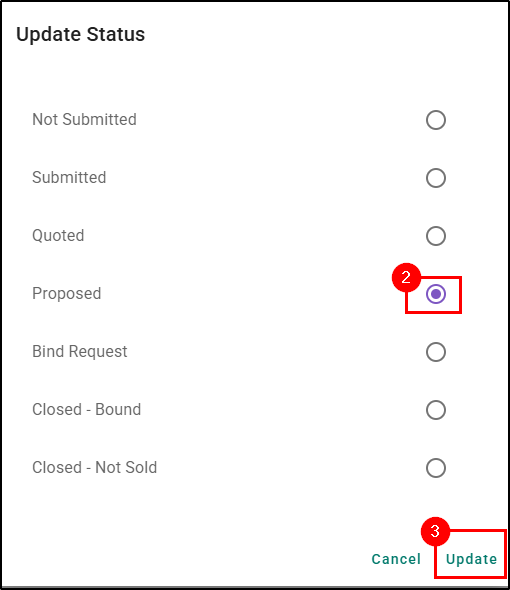
To update the status of a specific LOB for a carrier:
1. On the Carriers Submission step, select the Manage submission button on the carrier card.
2. Expand the specific LOB you'd like to update.
3. Use the Status dropdown under the LOB to update just that LOB.
Updating the status this way will automatically update the statuses at the carrier and submission level which we will cover how to update next.
 |  |
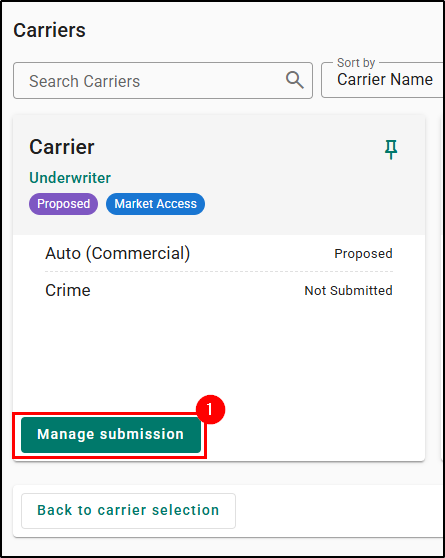
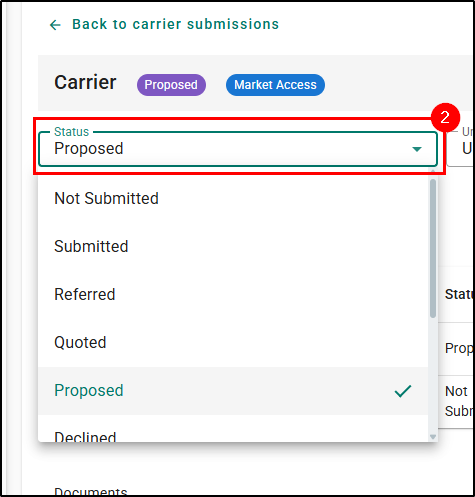
To update the status of a specific carrier:
1. On the Carriers Submissions step, select the Manage submission button on the carrier card.
2. Use the Status dropdown to select the new status. This will automatically update the purple chip to reflect the new status for quick reference.
 |  |
To update the status of the entire submission:
1. On the Carriers Submissions step, select the purple status chip next to the Submission Title.
2. Choose the status you'd like for the entire submission.
3. Select Update to finalize the change.
 |  |
Creating a Proposal
Once you've gotten some successful quotes back from the carrier, and marked the status as Quoted, you can create proposals.
To create a proposal:
1. Select the Actions button at the top of the page.
2. Choose Create Proposal. This will start the Proposal workflow.

3. Choose which of the carriers you'll be proposing. The premium amounts are pre-filled from the required Premium Field when you change an LOB's status to quoted.
4. Then, select Generate Proposal.
 |  |
While the system works on generating the proposal you will see a loading bar and a message in the bottom right of the page that states, "Generating proposal. This process can be time consuming." When it's generated, the Word Editor window will open with the Proposal.
The proposal summary document contains the following elements:
- Cover page with customer name and agency contact information
- Premium Summary - simple grid of the quote information which is pulled from the Submission detail fields you manually entered.
- Customer Acceptance Form
While the information on the Proposal is pulled from the Details tab and the Submission Details fields, you can edit the document if there are any errors or you want to add more information before sending to the customer.
 |  |
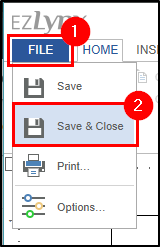
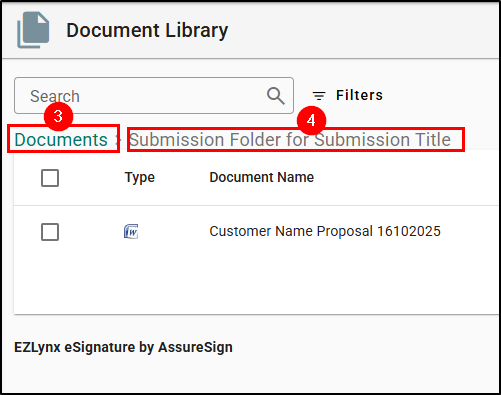
When you are done editing the proposal select File and choose Save & Close. You can then find the created proposal under the Documents tab in the respective Submission folder.
 |  |
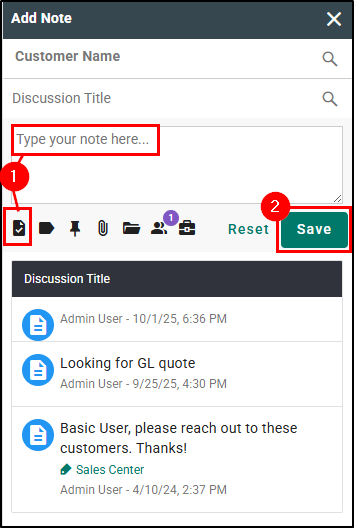
View Activity
When you create a submission, EZLynx leverages the Agency Workspace Discussions to keep all activities on the submission in one place. To view the discussion, select the View Activity button at the top of the page. This will open the Add Note pane on the right side.
You can view any previous notes or tasks in the Discussion thread near the bottom of the pane.
 |  |
To add a new note or task to the discussion, use the "Type your note here..." field or the task button and then Save. Check out our Agency Workspace - Notes, Tasks, & Task Reminders article to learn more about everything Agency Workspace can do.
Additionally, you can click on the History button on the Carrier Submissions page to view Submission History. This includes:
- Date
- Carrier Name
- LOBs
- Documents
- Underwriter
- Producer Code


Win vs. Loss
When it comes to decision time for your customer, you'll want to notate which way they went.
Declined
Sometimes the carrier may decline the submission. You'll want to update the submission accordingly.
1. Navigate to the Carrier Submissions step.
2. Select the Manage Submission button on the respective carrier.
 |  |
3. Expand the LOB.
4. Use the Status dropdown to choose Declined.
5. Finally, use the Declined Reason dropdown to select why the LOB was declined.

Bind Request
Before moving to the Bound stage, you can put the LOB in the Bind Request status and create an Insurance Binder. To generate an Insurance Binder:
1. Navigate to the Carrier Submissions step.
2. Select the Manage Submission button on the respective carrier.
| |
3. Switch the Status to Bind Request and input the Premium.
4. Select the Generate ACORD form button. This will open the Form Selection window.
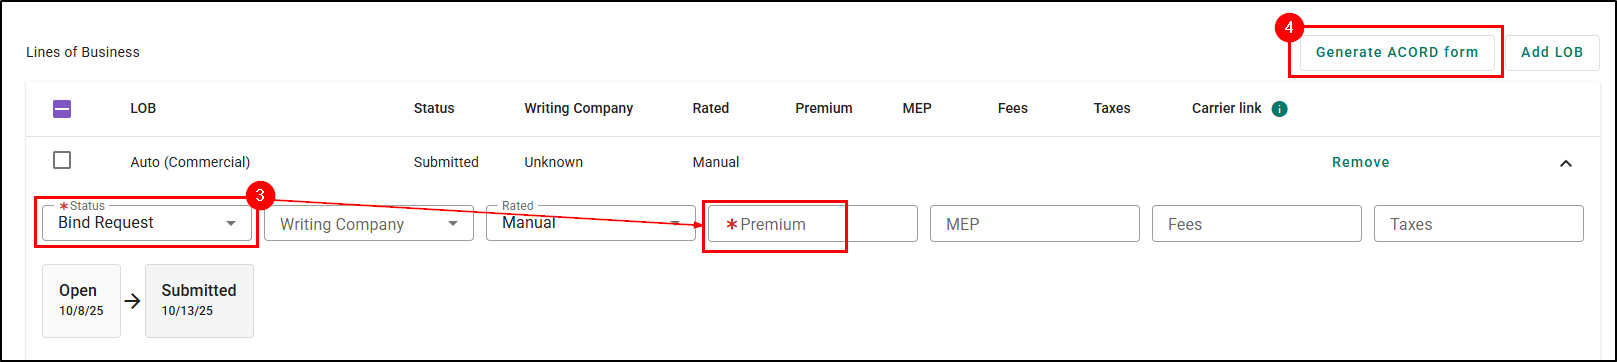
5. Select the ACORD Forms tab.
6. Search Binder.
7. Check the box next to the Insurance Binder.
8. Name the document.
9. Select Preview. This will open the ACORD Forms window where you can review and edit the form before saving or sending it.
Just like the Proposal, you'll find the binder under the customer's Documents tab in the respective submissions folder.

Bound
When you are ready to bind the policy, we need to update the submission. To update the the submission to Bound:
1. Navigate to the Carrier Submissions step.
2. Select the Manage Submission button on the respective carrier.
| |
3. Expand the LOB.
4. Change the Status to Bound and update the Premium if you haven't already.
5. Select Add Policy. This will take you to the Add Policy page.

6. Fill in the necessary information and click the Save button.

You'll now see the "Policy Created" note and the Policy Link to the created policy.

If you already have an Insurance Binder generated and signed and you simply need to upload it to the Submission, you can select the Add Insurance Binder option and then upload the file from your computer.

Premium Agreement
If your agency has the Premium Finance integration you can generate agreements directly within the Submission pages. To generate an agreement:
1. Select the Actions button at the top of the page.
2. Choose Create agreement. This will open the Premium Finance Agreement page.

3. Choose the quotes for the right carriers.
4. Select Continue at the bottom.
 |  |
5. Fill in the necessary information and then choose to Preview or Send to E-Sign.

We hope this workflow article was helpful in learning how to work commercial submissions. Please let us know if this article was helpful by answering the question below. Check out our related articles on the right-side of the page to learn more about EZLynx!
Did you find it helpful? Yes No
Send feedback