Policy Screen Modernization for General Liability Pilot
Modified on: Tue, 13 Oct, 2026 at 4:52 PM
We're excited to share the next phase of the Policy Screen Modernization: the Pilot for the General Liability (GL) line of business!
 | Please note: The GL Policy Screen Modernization is currently in Pilot and only available for certain customers. Please look out for future releases for updates and general availability information. |
If you are part of the Pilot, you can now work on GL policies in a cleaner, more guided experience designed to help you move faster with fewer clicks. A step-by-step layout brings your key GL policy work into clear sections (Insured Information, General Liability, Underwriting, and Additional Interest), so you can focus on completing work, not hunting for information across multiple places. You'll also find it easier to spot what needs attention before you save.
The result: a smoother, more confident policy workflow from start to finish.
TABLE OF CONTENTS
 | Did you know? - You can click on the images in our articles to make them bigger! |
What's in it for me?
These improvements are built to reduce friction when you’re working in GL policies—especially when you’re moving quickly between sections or revisiting policies later.
- Save time and clicks with GL sections organized in a more intuitive flow
- Stay on track with clearer navigation between key policy steps
- Reduce back-and-forth by making it easier to identify what’s missing before you can save
- Work more efficiently with insured details grouped into clear, collapsible sections
- Manage additional interests more easily with a simplified import process
- Work seamlessly in commercial packages by using the updated GL screens right inside your package
- Complete GL change requests with clearer guidance at every step
How it works
This experience supports three connected workflows: working in the GL Policy screens, using modernized screens when GL is part of a commercial package, and completing a GL change request.
Accessing the feature
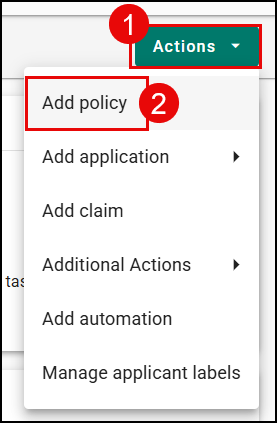
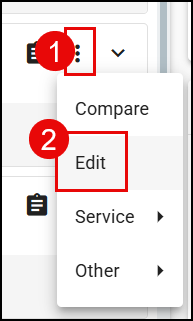
You can create and edit a GL policy from multiple familiar places in the product, including:
- The Overview area (Add Policy → GL, or Edit an existing GL policy)
- The Policies area (Add Policy → GL, or Edit an existing GL policy)
- The GL Policy Summary area (Edit)
 |  |
Step-by-step
1. Open a GL policy (new or existing) from your preferred entry point.
2. Use the step-by-step workflow to move through key areas such as:
- Insured Information
- General Liability
- Underwriting
- Additional Interest
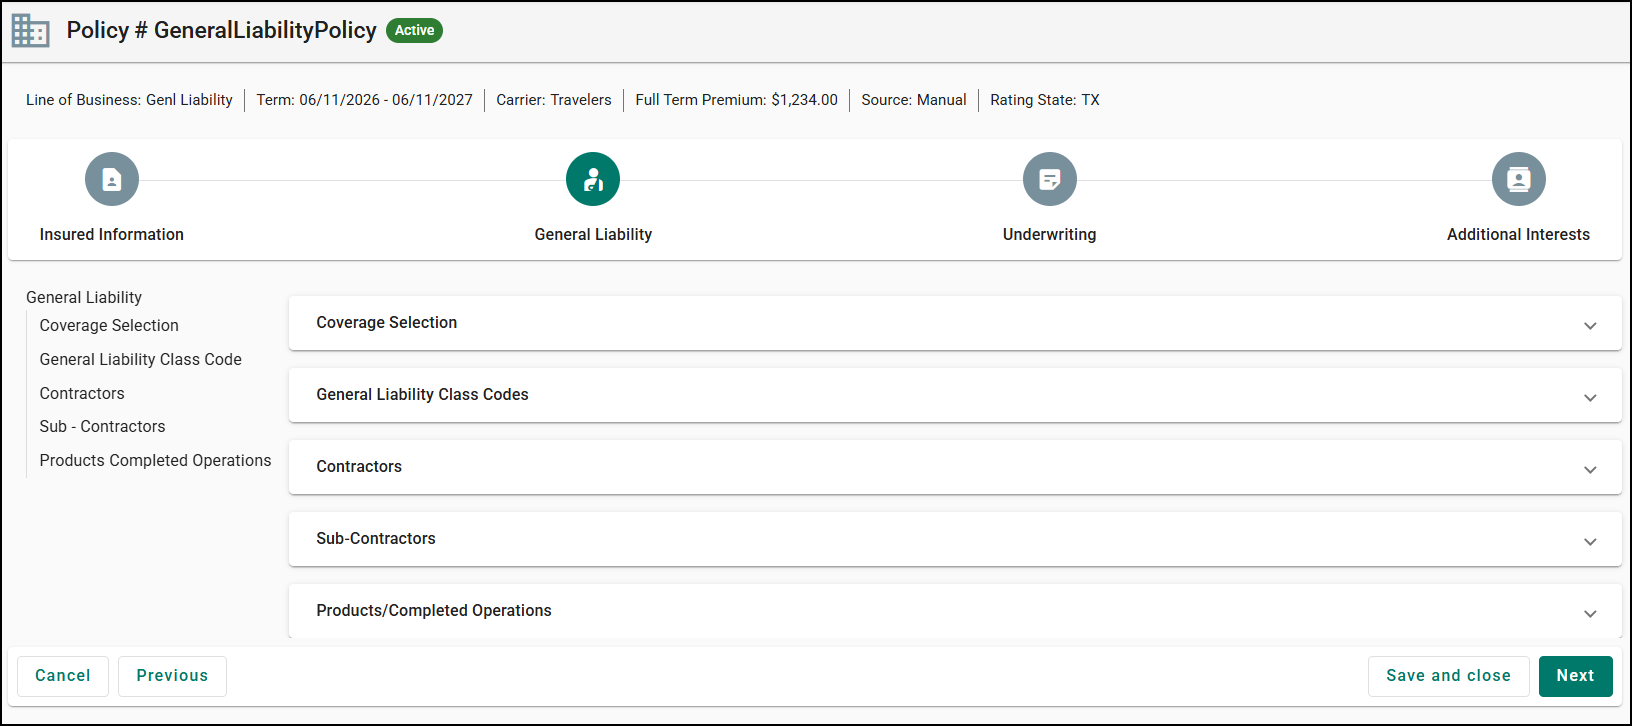
3. Review your insured details in organized sections that are designed to be easier to scan and manage. You can collapse and expand each one:
- Business Information
- Locations
- Prior Carrier Information
- Loss History
- Policy Contacts
- Additional Named Insured
4. Complete your GL details in a more consolidated layout. Key GL sections come together on one page, so you don't have to jump around to continue your work.
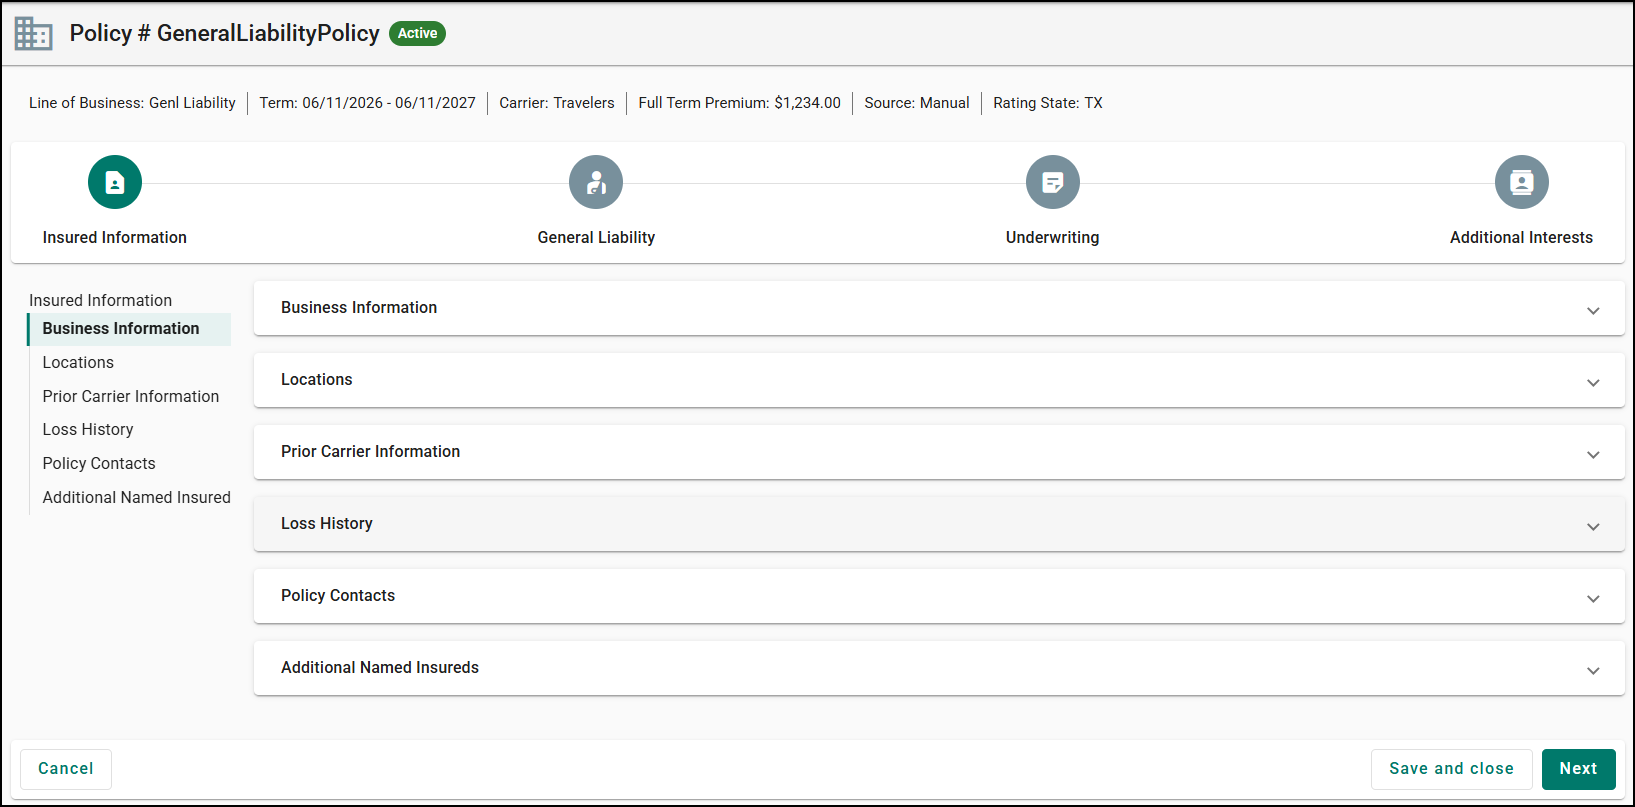
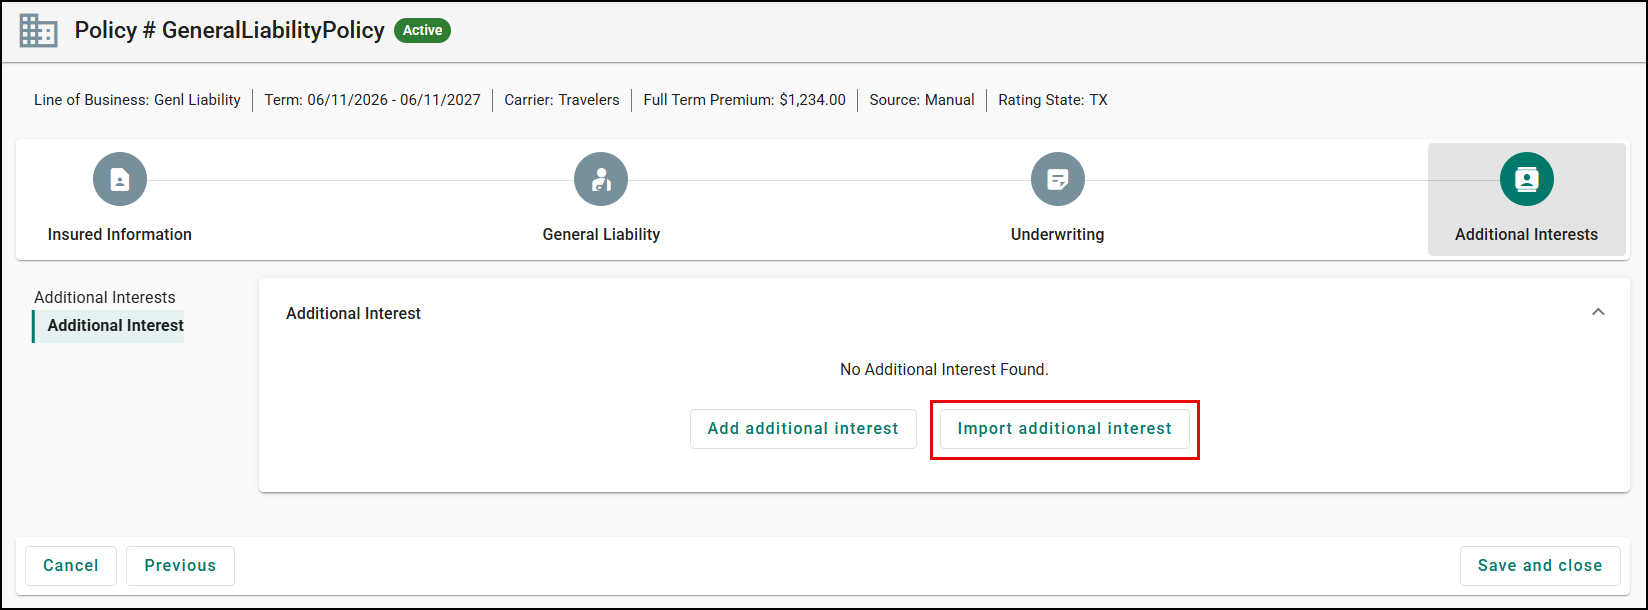
5. Import additional interests using a simpler process, making it easier to bring in details without unnecessary steps.
Working with GL inside a commercial package
If your GL policy is part of a commercial package, you can use the modernized GL screens without leaving the package.
1. Open a commercial package that includes GL. Navigate to the GL line of business (LOB) to use the updated GL experience.
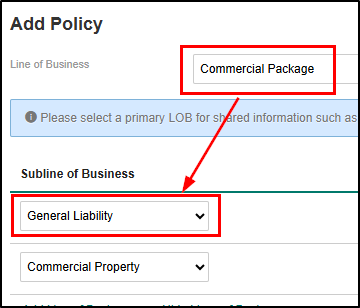
2. Use the updated GL screens. Review and maintain your GL information with the latest GL components while you're in the GL LOB.
3. Continue using the package experience for your other lines of business. If you select a line of business that hasn't moved to EZ5 yet, you'll return to the EZ4 experience for that line.
EZ5 Screens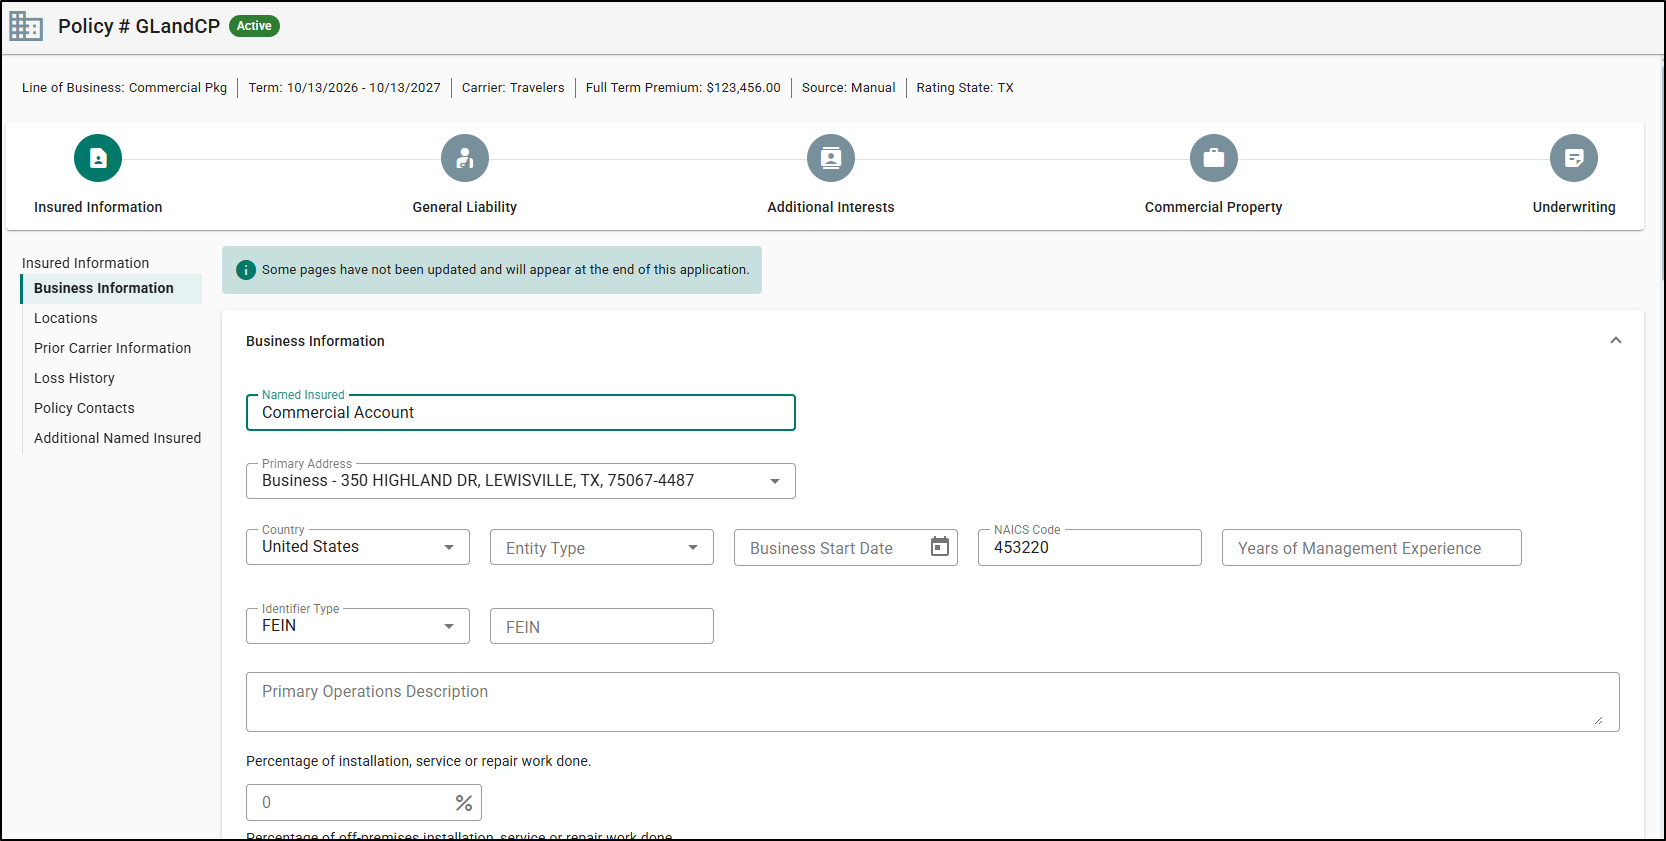 | EZ4 Screens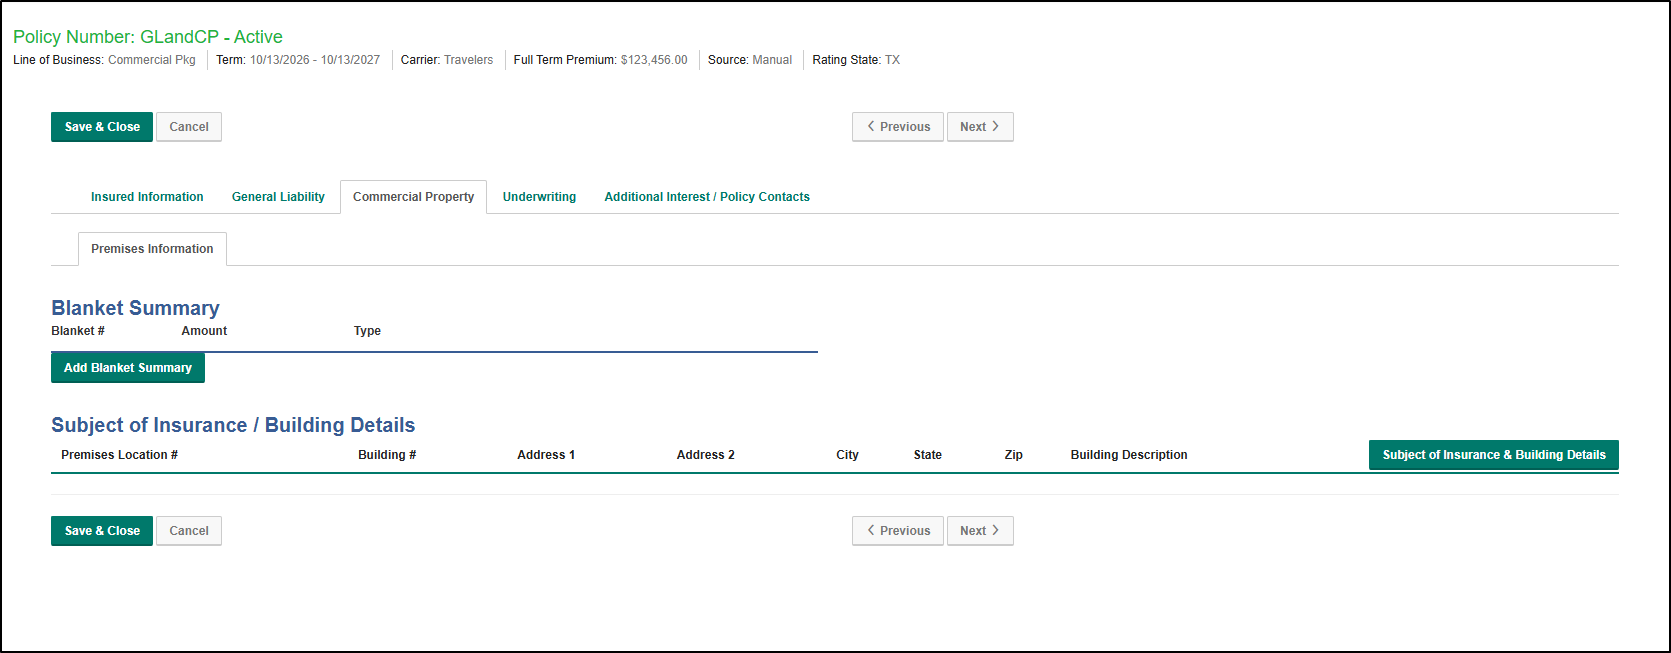 |
4. Know what to expect on the Underwriting page. If at least one line of business in your package hasn't moved to EZ5, the Underwriting page stays in EZ4. Once all lines of business have moved to EZ5, the Underwriting page will also move to EZ5.
5. Review additional interests. The LOB option shows all lines of business in the package when working with additional interests.
Creating a GL change request
You can now complete a GL change request in the updated experience.
1. Begin the change request from a GL policy.
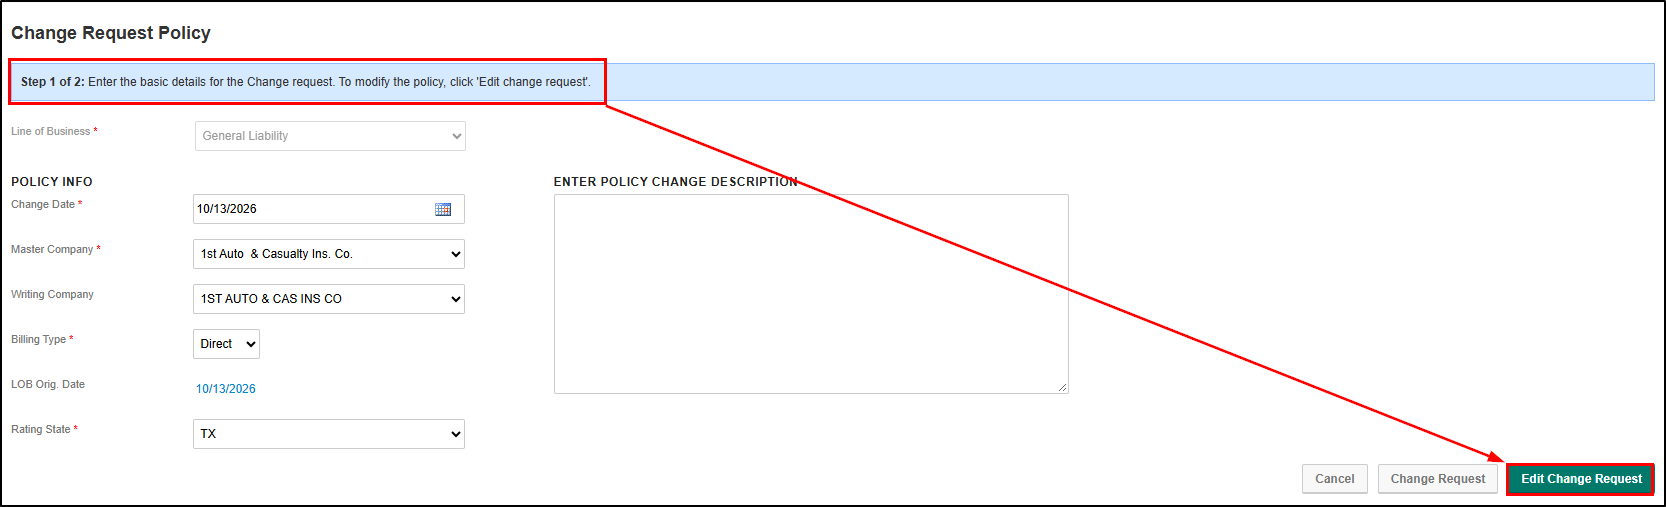
2. Step 1 of 2: Enter the basic details. The workflow displays an updated blue information message that states: "Step 1 of 2: Enter the basic details for the Change request. To modify the policy, click 'Edit change request'."
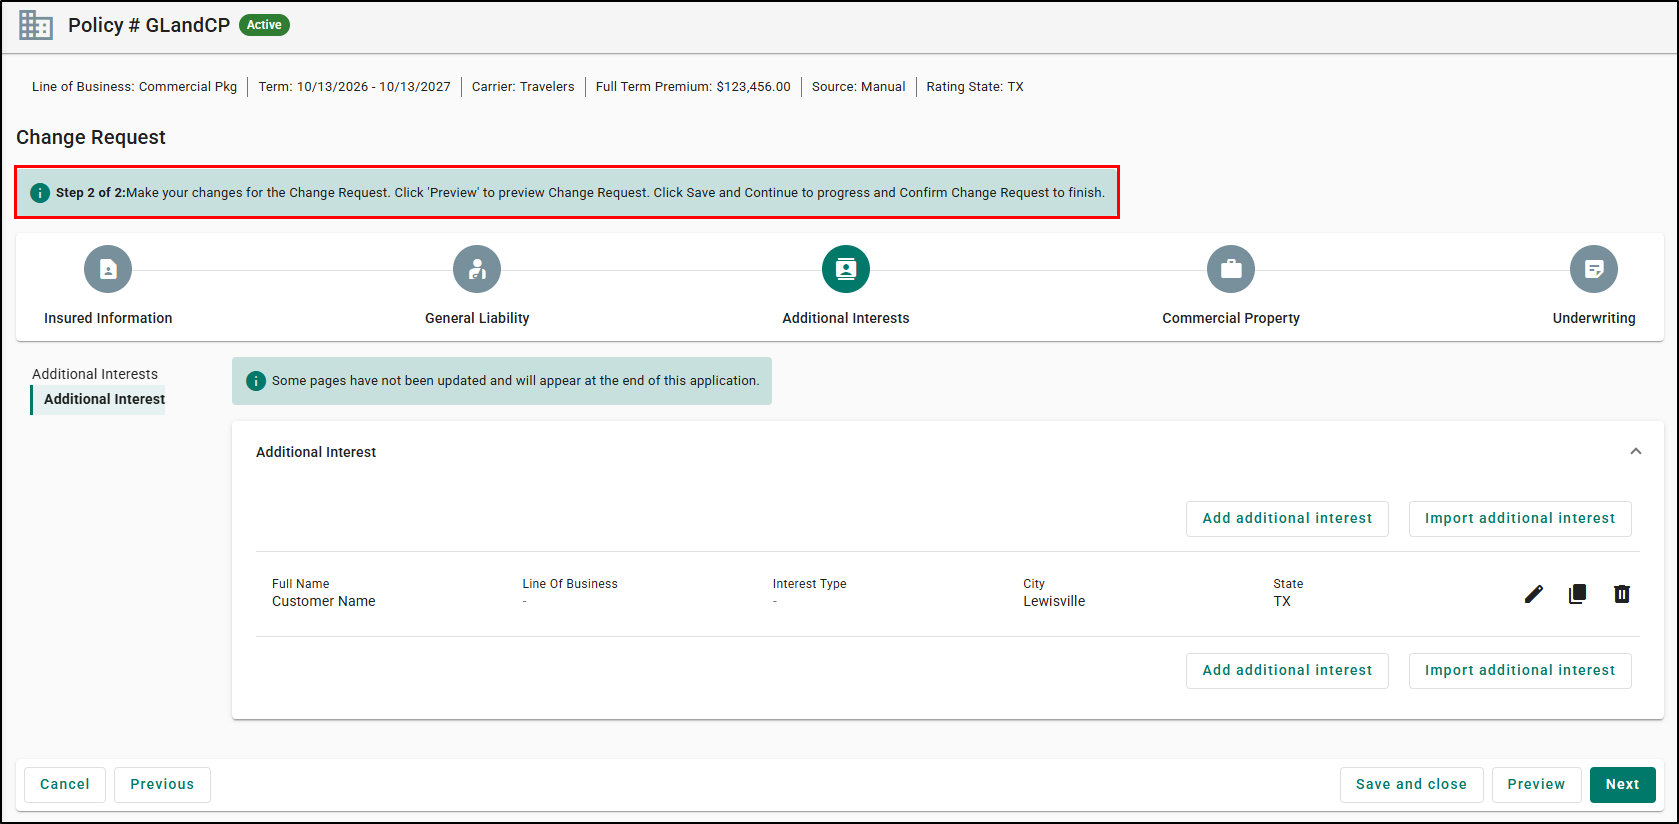
3. Step 2 of 2: Make your changes. Your change request details display below the policy details, along with updated "Change Request" guidance.
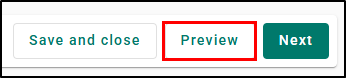
4. Preview your change request. Click Preview at any point across the workflow sections: Insured Information, Coverage, Additional Interest, and Underwriting.
5. Save and close. Use Save and close when you're ready to finish.

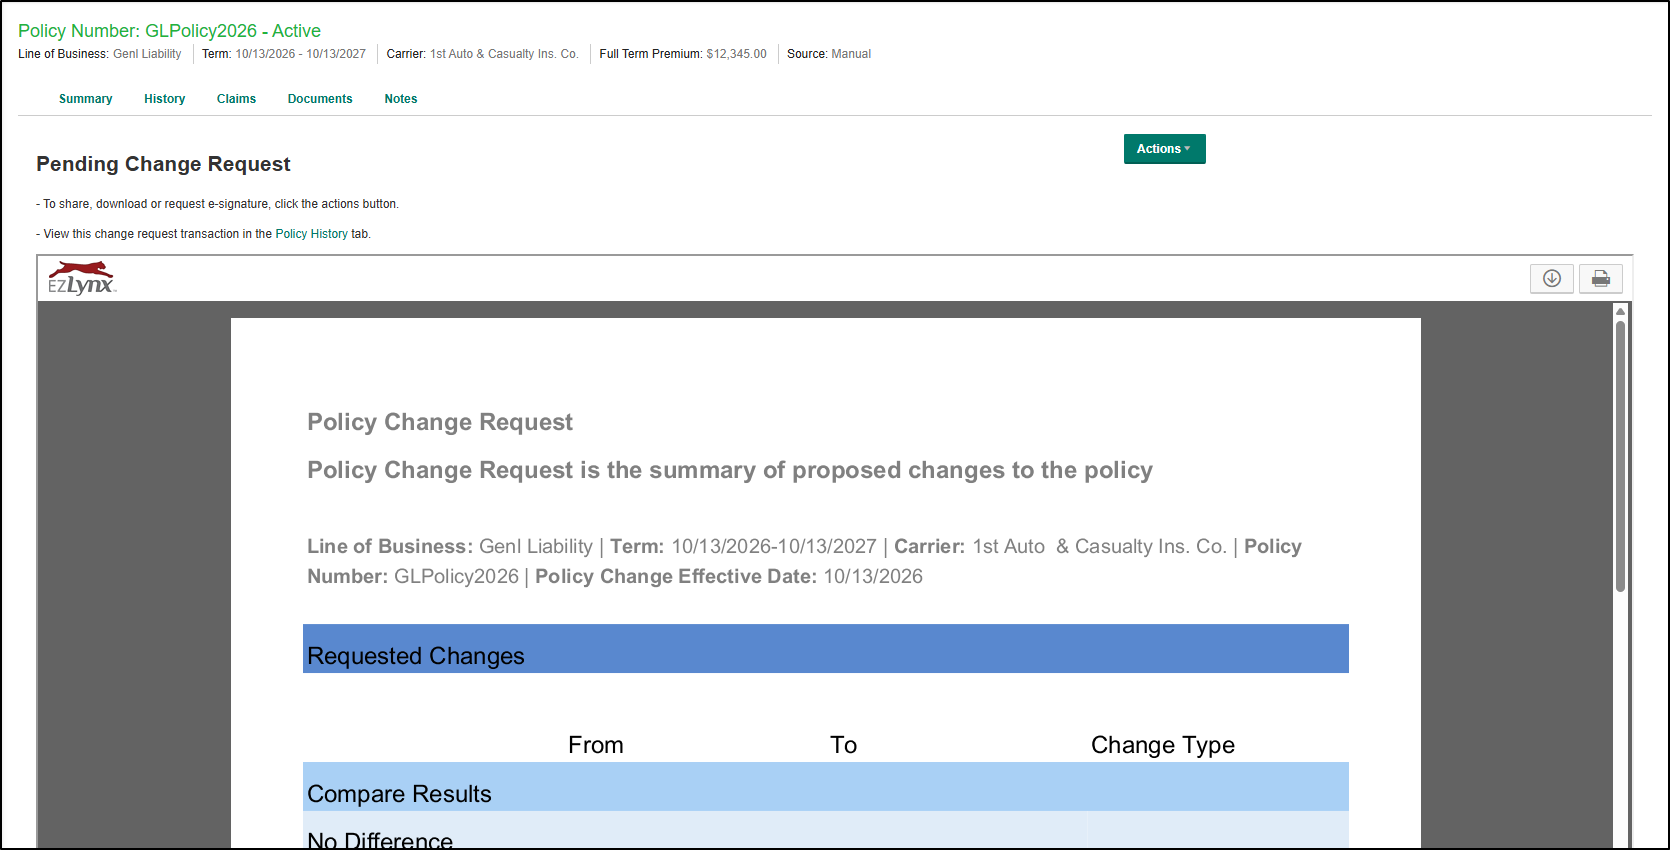
6. Review the pending change request. After you save, you're taken to the Pending Change Request page, where you can click the actions button to share, download, or request an eSignature.
Practical Applications
3 ways your agency can get the most out of this feature:
Faster policy completion during busy days
- Use the consolidated GL layout and step-by-step navigation to move through the policy without losing your place.
Fewer save interruptions and less frustration
- When a policy can’t be saved, quickly pinpoint the exact section that needs attention—without manually searching.
Cleaner reviews when revisiting policies
- With insured details grouped into clear sections (and the ability to collapse/expand), it’s easier to scan and confirm information when making updates.
We hope you are excited about this pilot and look forward to our future releases. Please let us know if this article was helpful in learning about the pilot by answering the question below. Check out our other articles to the right to learn more about EZLynx!
Did you find it helpful? Yes No
Send feedback