Create Package from Separated Lines
Modified on: Thu, 15 Jan, 2026 at 7:14 PM
If your agency has been on the AMS system for more than two years or have had your policies brought over from a data conversion, you may have experienced having your package policies broken out into individual lines. This Create Package feature provides a solution to restore these policies to the intended package structure.
TABLE OF CONTENTS | Check out our video if you'd rather watch and follow along!  |
 | Did you know? - You can make the images in our articles bigger by clicking on them! |
Accessing Create Package
To access the Create Package option there must be more than one policy on the account:
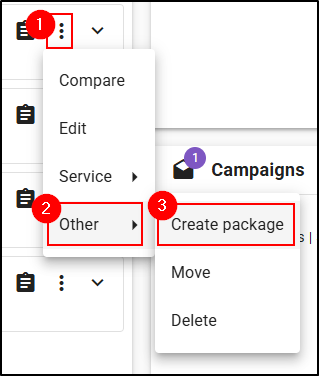
1. Select the Actions icon next to the Active policy you want to retain.
- Please note, the policy number for the package will be the policy number of the retained policy. Meaning you should start the workflow from the policy you want to retain the policy number from.
- You cannot create create packages on inactive policies/packages.
2. Then, hover over the Other option.
3. Choose Create Package. This will open the Create Package page.
Select LOBs
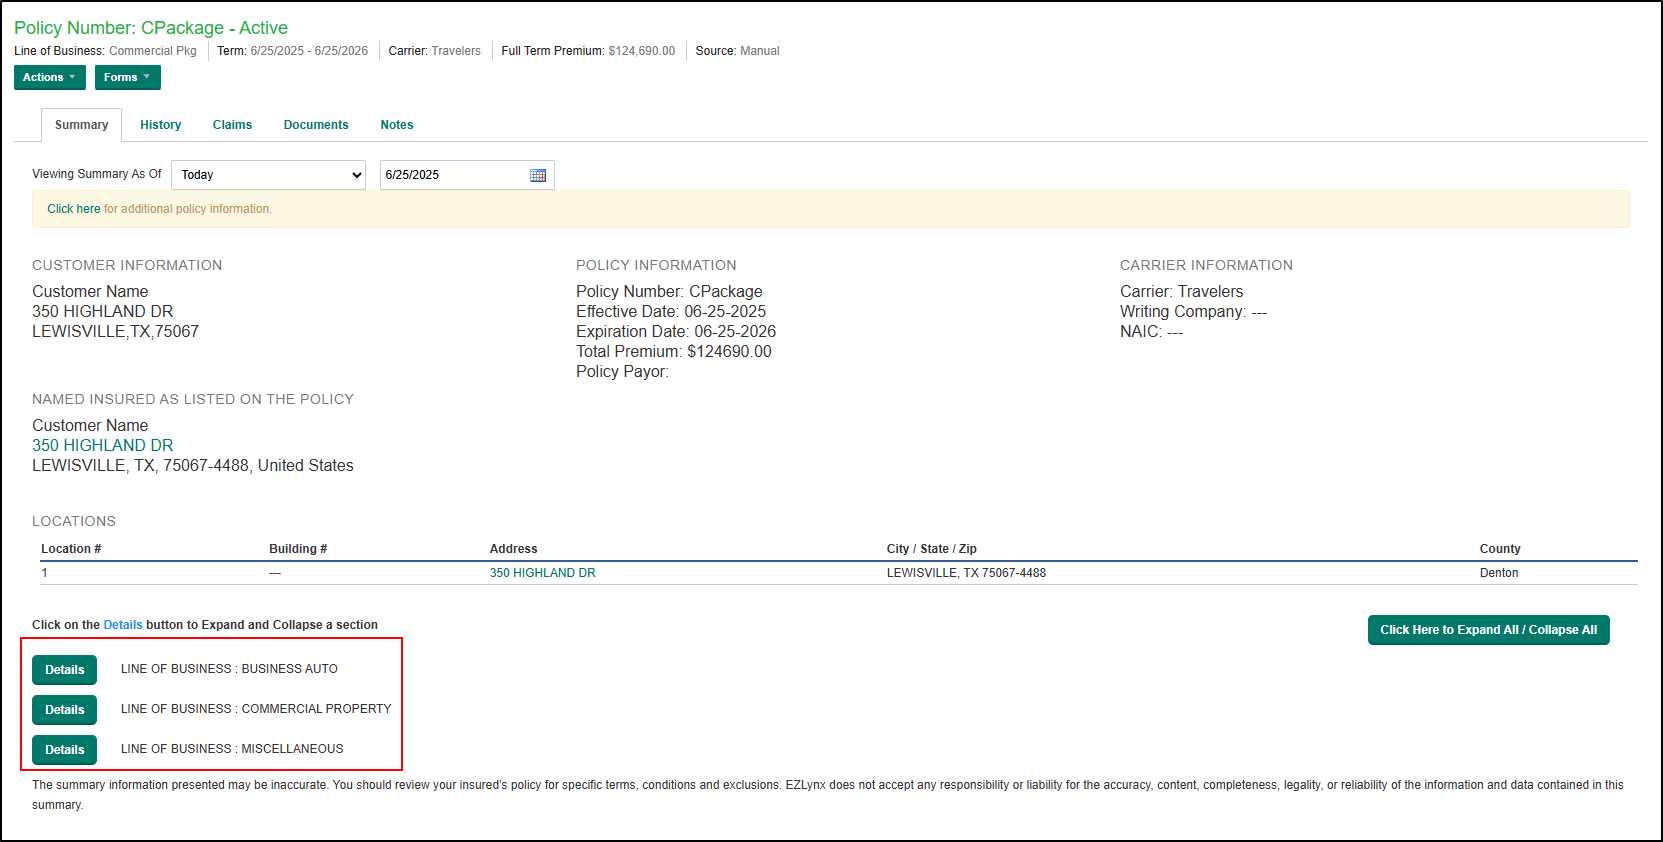
The first step is 'Select LOBs'. On this step, you will find two sections. The first section is the Retained Policy section and displays the following information for the existing policy:
- Policy number
- LOB
- Sublines
- Carrier
- Effective Date
- Expiration Date
The second section is a list of the available policies that can be merged based on the following criteria:
- Must be on the same applicant/account
- Must be the same policy type (Commercial or Personal)
Please note, you cannot create a package when two monoline policies have the same Line of Business. Instead you will need to merge those policies together. Check out our Policies - Creating & Managing Your Policies on how to merge policies together.

After you have checked the boxes next to the polices you want to merge, select the Continue button on the bottom-right to move to the next step.
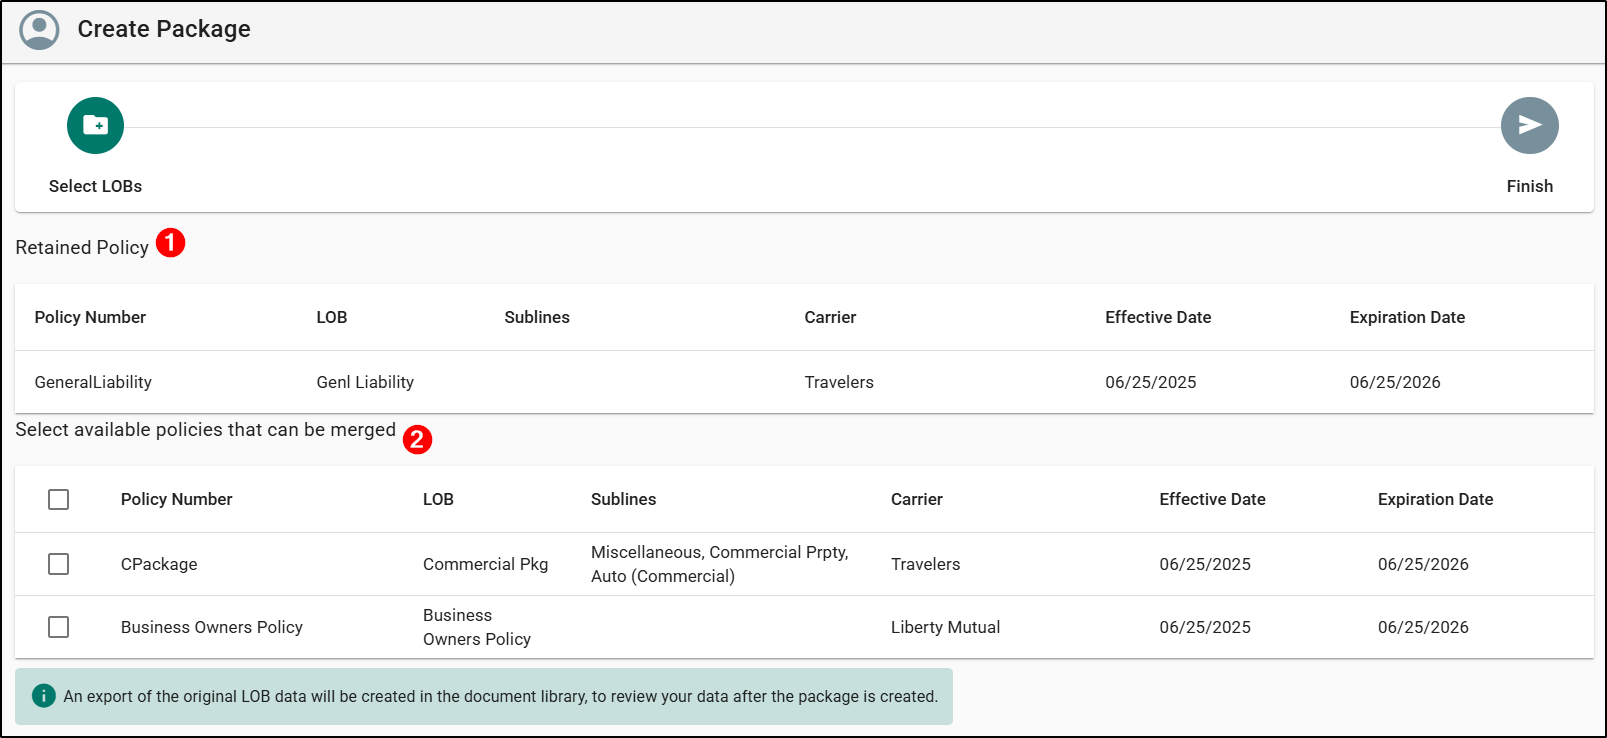
 | Attention! - Personal and Commercial Policies can't be merged into one package. |
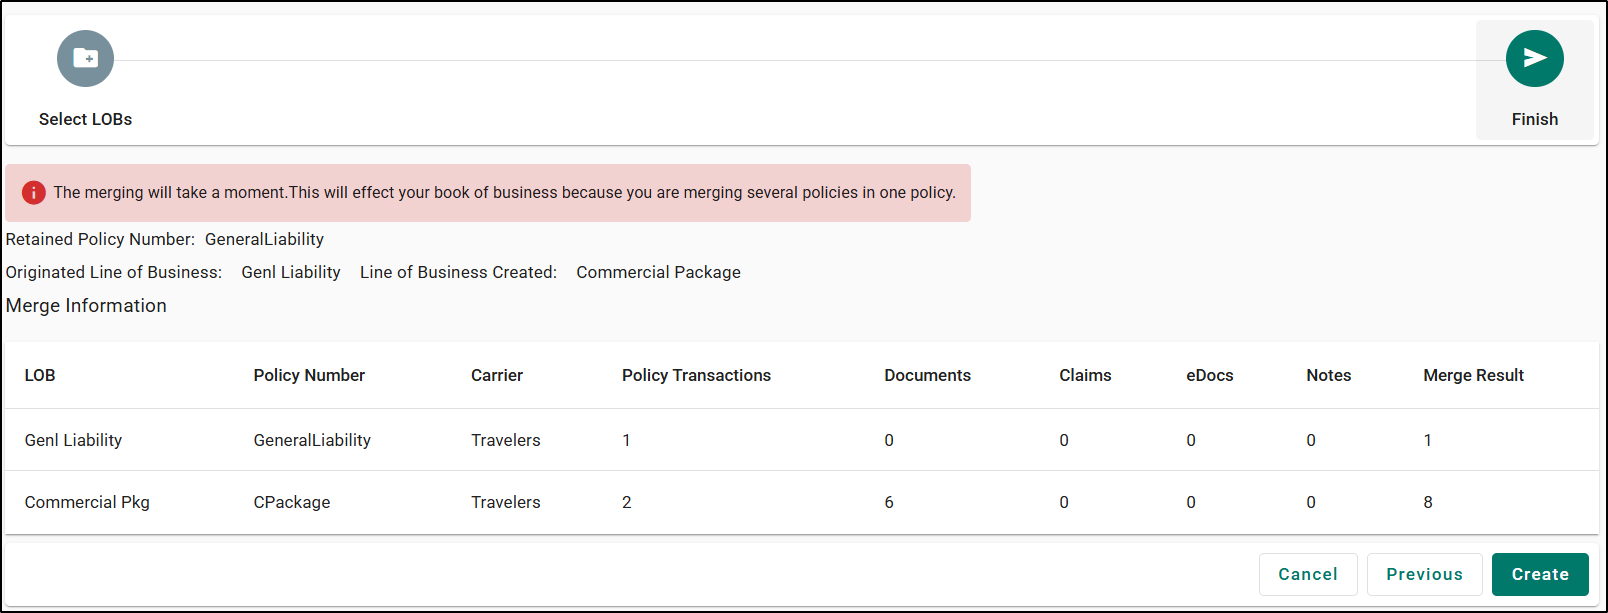
Finish
Before the creation of your package, you'll have an opportunity to review it. You should verify:
- Retained Policy Number - This is the policy number of the policy you started the workflow on and will be the policy number for the Package once created.
- Originated Line of Business - This is the LOB of the policy you started the workflow on.
- Line of Business Created - This will be either Commercial or Personal Package depending on the policy types.
Please note, inactive policies/packages will display as transaction history in the package.
This step also provides information that details what is contained in the merge:
- Policy transactions
- Documents
- Claims
- eDocs
- Notes
When you are ready, select the Create button in the bottom-right to complete the merge process.
Review Policy Details
Once the package is successfully created, the system will redirect you to the policy summary screen of the newly created package policy. The individual policies that were merged have been removed and will no longer be available.
Once the package is established, it's important to go through the complete policy details thoroughly.
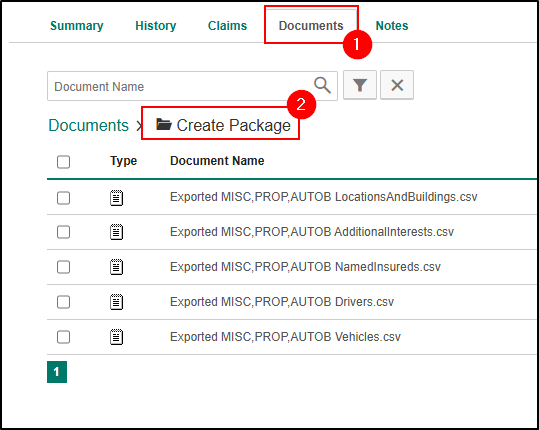
The system will automatically export policy data into the Documents library for every line of business that has been merged. This data can then be referred to if there is a need for any data adjustments.
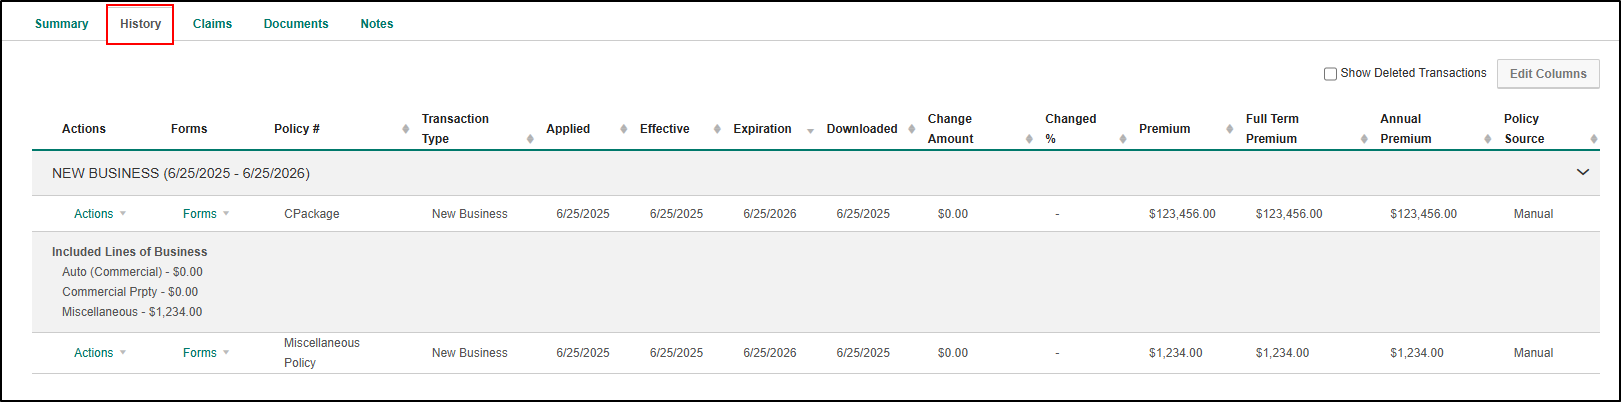
In the history section, you will see the included line of business transaction and pending change requests for the selected LOBs.
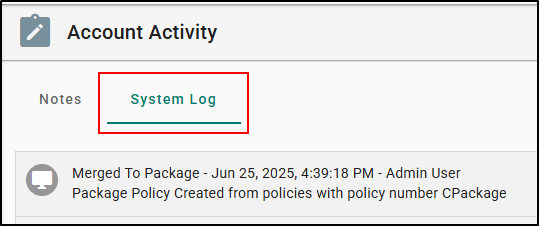
Finally, in the system log, you will find entries for Merged to Package, Manual Policy Archived, and Policy Modified to document that the Package Merge happened, that the singular policy was removed, and that a Change Request transaction has been entered for the selected LOBs.
We hope this article was helpful in learning how to merge single lines of business that should be a package policy. Please let us know if this article was helpful by answering the question below. Check out our related training articles on the right-side to learn more about EZLynx!
Did you find it helpful? Yes No
Send feedback