New Create and View Invoice pages for Accounting
Modified on: Wed, 25 Feb, 2026 at 5:00 PM
We are pleased to unveil the new Create Invoice and View Invoice pages that will be enabled for applicable Accounting Users. These new pages provide a modernized version of the existing pages while building on the foundation for future enhancements.
Currently, we will be rolling out these new pages to agencies with Accounting, but do not use the installment invoice feature. Support for the installment invoice feature will be added later in a future release. When that time comes, we will roll out these new pages to the rest of our Accounting product users.
In this article, we will cover the new Create Invoice and View Invoice pages so you know how to access them and where everything is in the new user interface.
TABLE OF CONTENTS
- What's in this for me?
- Accessing the New Create Invoice Page
- New Create Invoice Page
- Accessing the New View Invoice Page
- New View Invoice Page
 | Did you know? - You can click on the images in our articles to zoom in. |
What's in this for me?
This update introduces redesigned navigation and removes several challenges that previously hindered efficiency and usability. It makes it easier to save, edit, and finalize invoices while improving control over due dates and status tracking. It also delivers clearer, more professional print outputs and enhances visibility into policy premiums and totals, ensuring every invoice is accurate and auditable.
These changes support the needs of mid-tier agencies by offering a robust accounting platform without unnecessary complexity, and it also lays the foundation for future enhancements such as multi-policy invoicing, so keep an eye out for future releases.
Accessing the New Create Invoice Page
The modernized Create Invoice page can be access from multiple places in EZLynx. No matter which path you take, you will be taken to the new Create Invoice page.
To access the Create Invoice page from Pending Transactions:
1. Hover over the Accounting icon (dollar bill) on the left navigation bar.
2. Choose Billing. This will take you to the Invoices tab.
3. Move to the Pending Transactions tab.
4. On a Pending Transaction, open the Actions menu by clicking on Select.
5. Choose Bill. This will open the new Create Invoice page.
 |   |
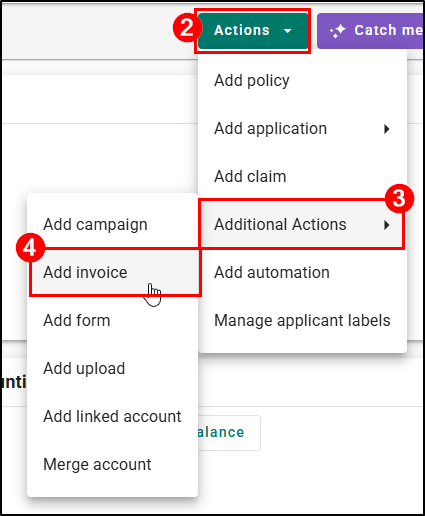
To access the Create Invoice page from the Applicant Overview:
1. Navigate to a customer's Overview page.
2. Select the Actions button to open the Actions menu.
3. Hover over Additional Actions.
4. Choose Add Invoice. This will open the new Create Invoice page.
 |  |
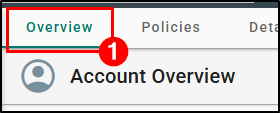
To access the Create Invoice page from a policy whether editing or creating:
1. Navigate to a customer's Overview page.
If creating a policy:
2. Select the Actions button.
3. Choose Add policy.
If editing a policy:
2. Select the Action icon (vertical dots) next to the policy in question.
3. Choose Edit.
Regardless if creating or editing a policy:
4. Change Billing Type to Agency.
5. Change Generate Invoice to Yes.
After filling out the rest of the required fields, regardless if which save/create button you choose you will be taken to the Create Invoice page.
 | Creating a Policy OR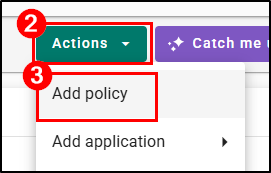 | Editing a Policy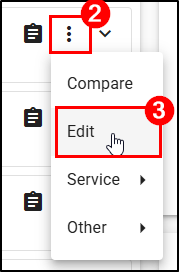 | 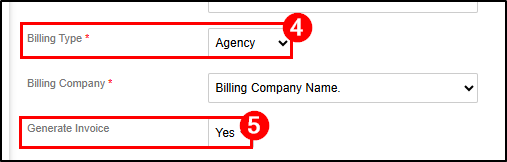 |
New Create Invoice Page
Now that you've made it to the New Create Invoice page, let's take a tour so you know where everything is.
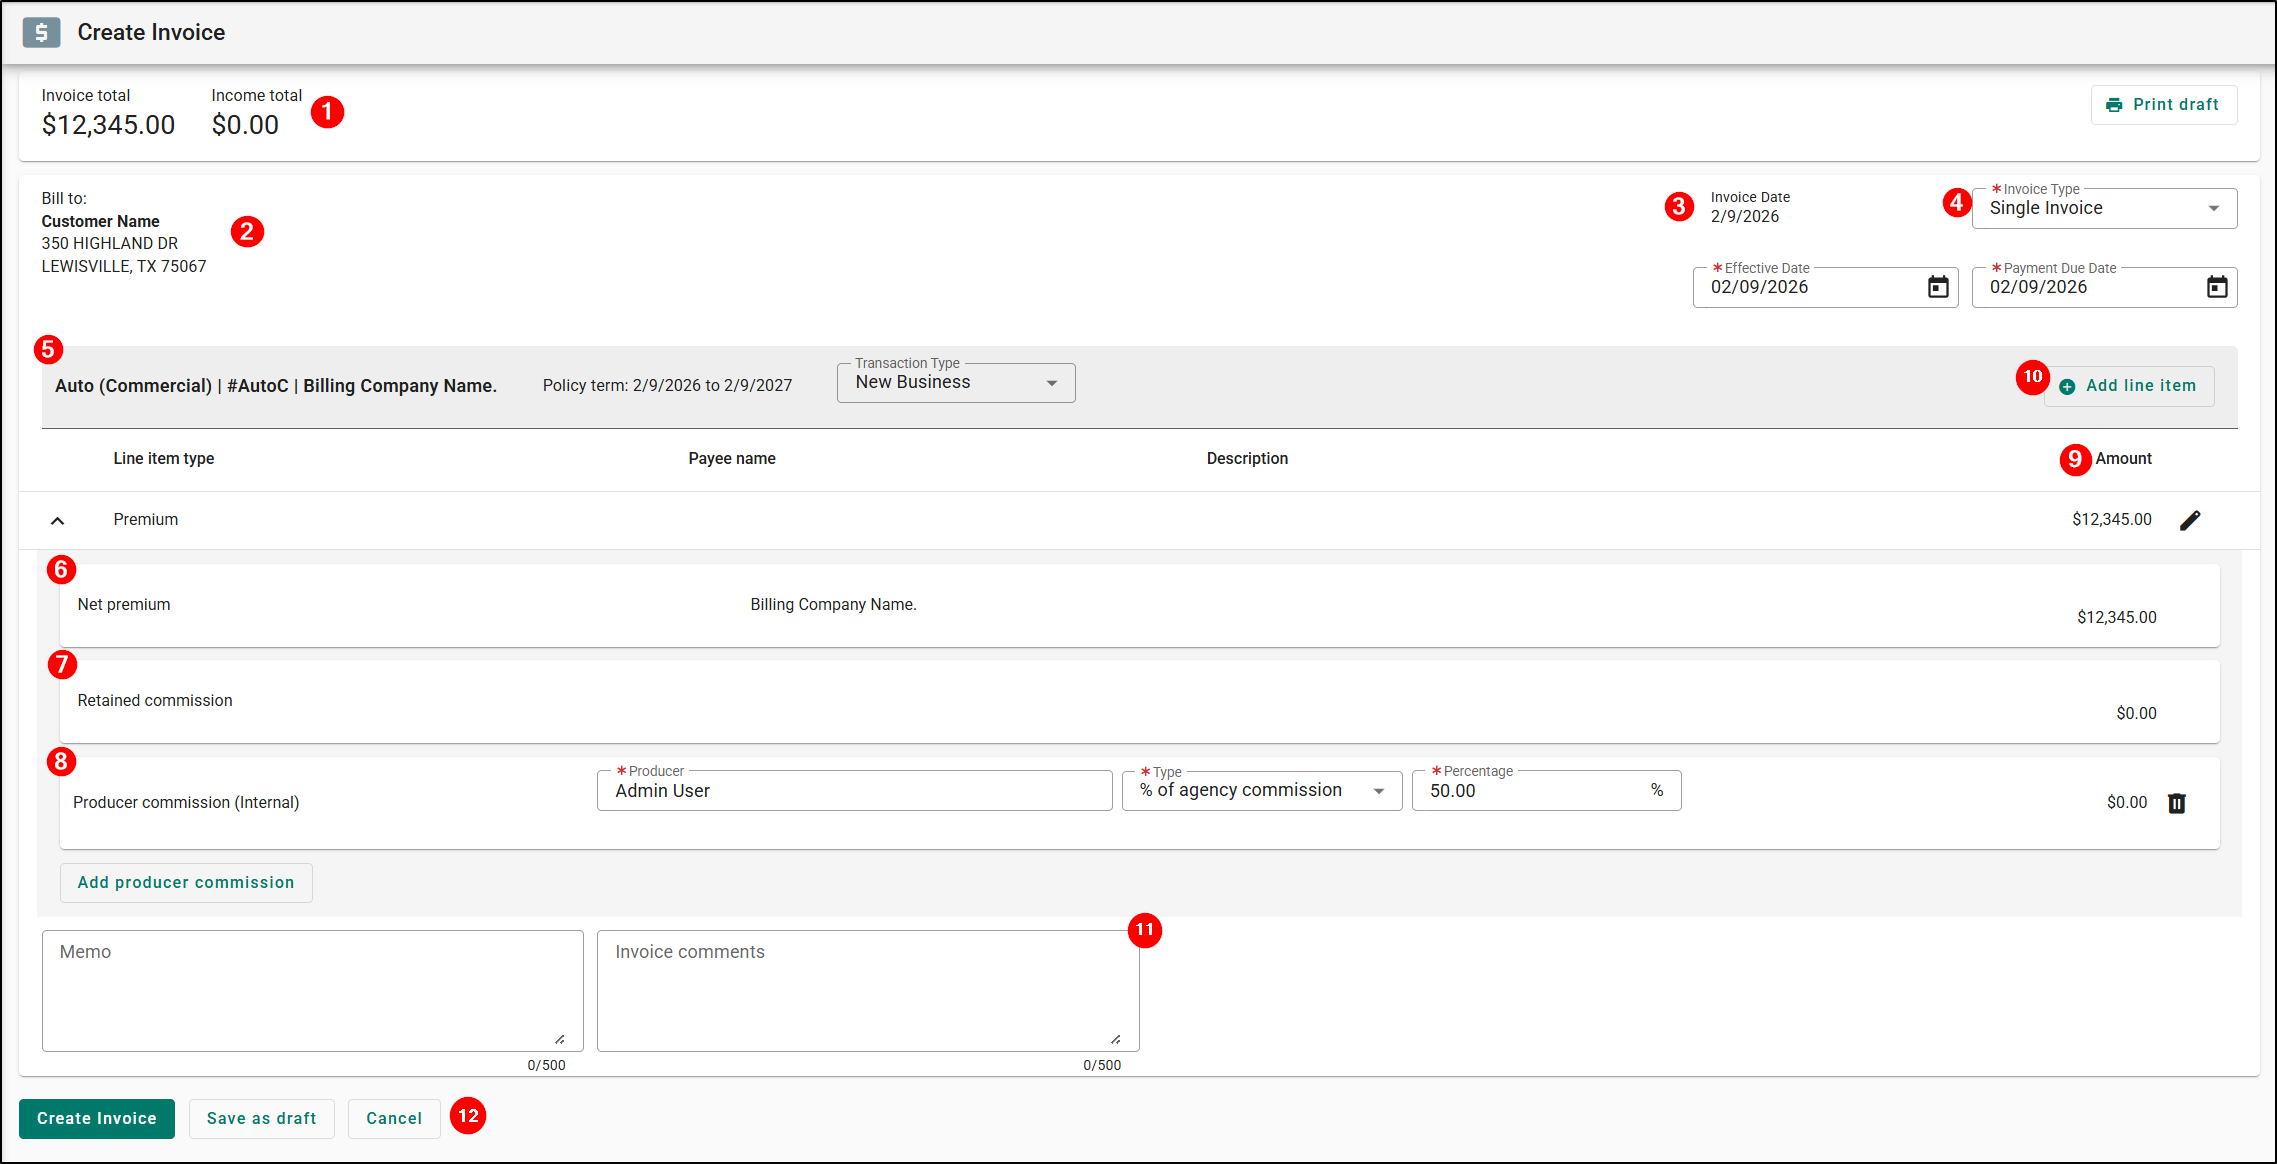
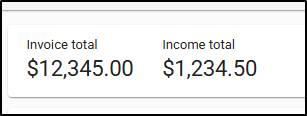
1. At the top-left you will find the totals for both the Invoice and Income.
|  |
| 2. Underneath the totals is the Bill to section. This section has the name and address of the insured. |  |
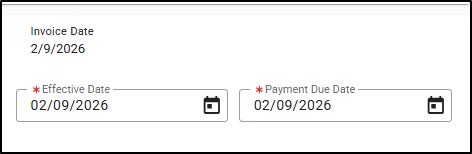
3. On the top-right under the Print draft button, you'll find the various dates.
|  |
| 4. Next to the Invoice Date, you'll find the Invoice Type dropdown. This will default to a single invoice, but can be used to convert the invoice to another type such as premium finance. Please note, support for Installment Invoices is not currently available in the new Create Invoice page. Support for Installment Invoices will be available in a future release. | 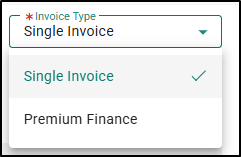 |
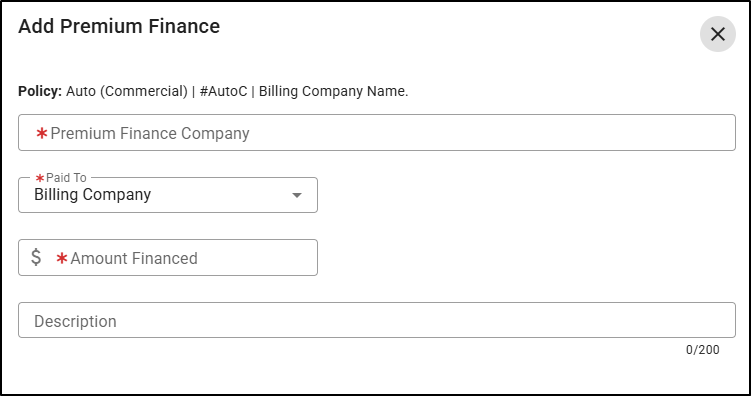
Changing the Invoice type to Premium Finance will display the Add Premium Finance side panel with the following info:
- Policy information
- Premium finance company drop down that will show all finance company payees.
- Paid to will allow selection for Billing Company or Agency.
- Amount financed
- Description
Once saved, the premium finance details will add a new line item. The amount financed will display as a negative value. If Paid to is a billing company, the payee name will also be displayed on the line item. Creating an invoice when premium finance is billed to Agency will generate 2 invoices, one that is addressed to the insured and another that is addressed to the finance company.
Please note, changing the invoice type back to Single Invoice will remove all premium finance line items and you will have to re-enter any Premium finance line items.

5. Back on the left side under the Bill to section, you'll find the Policy Header which includes the following information:
- Policy Information: This includes line of business, policy number and billing company.
- Policy Term: The term of the policy.
- Transaction type: This will default to the original policy transaction type but can be changed.

Underneath the Policy Header, you'll see the invoice table which contains the following columns:
- Line item type
- Payee name
- Description
- Amount
A Premium Line Item type will automatically be created when creating the invoice. Underneath that expandable section, there is Net Premium, Retained Commission and Producer Commission. Let's take a look at each one of these.

- This line item will automatically be created when creating the invoice.
- The Payee name will default to the payee on the policy.
- This line item will automatically be created when creating the invoice.
- The Amount is calculated based on billing premium, external commission and producer commission.
- These line items can be added using the Add producer commission button.
- The label on the line item will denote if the producer is external or internal.
- The Producer dropdown will list all external and internal producers grouped by type based on the Accounting Payees section.
- The Type dropdown has the options:
- Billing Premium percentage
- Agency Commission percentage
- Absolute dollar amount
- The Value will allow to enter a percentage or amount based on the selection from the Type dropdown.
- These line items can be deleted on a draft invoice using the Delete icon (trash can) at the end of the respected line item.
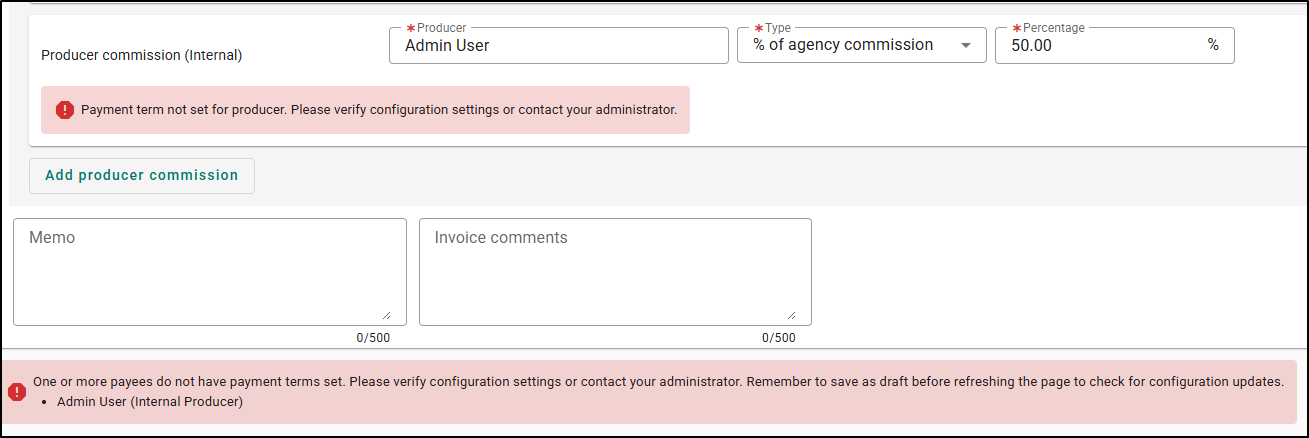
- The below error messages that you could see will allow you to save the invoice as a draft but will not allow you to create the invoice.
- An error message will be displayed if the selected producer's Payment Terms are set to None.
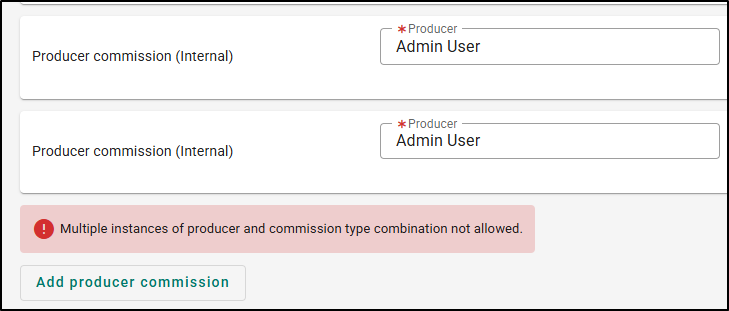
- An error message will be displayed if there are multiple instances of a producer and commission type combination are added.
- An error message will be displayed if the sum of all producer commissions is more than the gross commission.

9. The above Premium line items can be edited using the Edit icon (pencil) at the end of the main Premium line item.

This will display the Edit policy side panel with the following information:
| 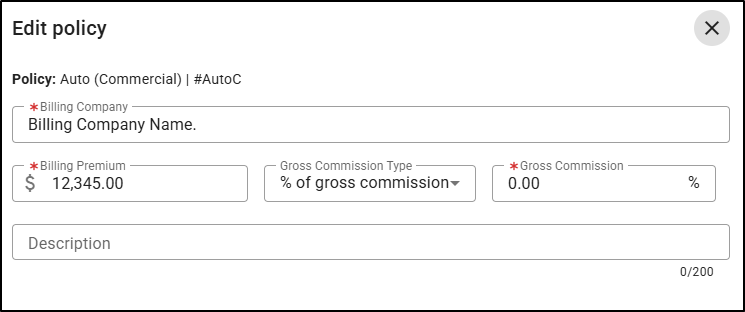 |
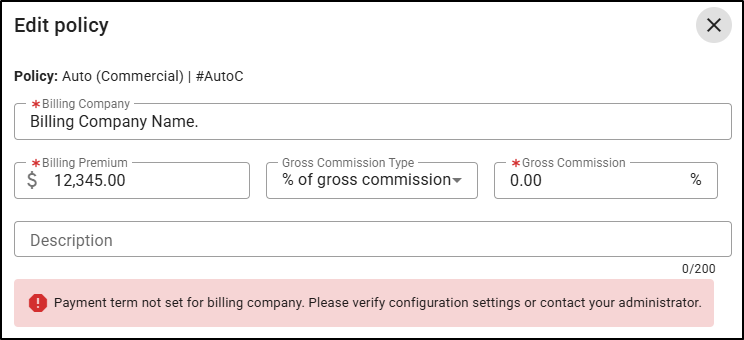
An error message will be displayed if the selected billing company's Payment Terms are set to None. This error message will allow you to save the invoice as a draft but will not allow you to create the invoice.
10. You can add additional line items using the Add line item button on the right-side of the grey bar. |  |
This will open the Add line item side panel with the following information:
| 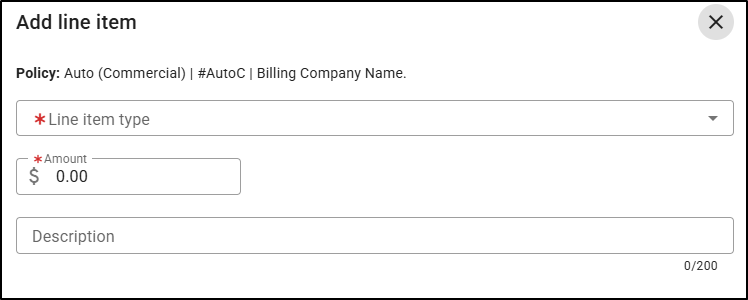 |
The additional line items that are added will display below the premium line items. Any split line items will also display as per current behavior. These line items can be edited or deleted on a draft invoice using the respective Edit (pencil) or Delete (trashcan) icons.

11. At the bottom of the Invoice table, we have made two text fields available to help keep internal Memo comments separate from customer-facing Invoice comments. Each field has a maximum character limit of 500. You can use the angled lines in the bottom-right corner of each field to change the size of the box to better view what you are typing.

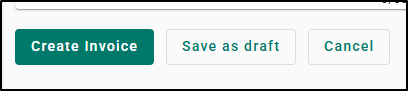
12. At the bottom of the page, you will find the page action buttons.
- Create Invoice will assign an invoice number, create journal entries for the invoice and will redirect you to the submitted invoice page.
- Save as draft will save a draft version of the invoice and stay on the Create invoice page. You will also be able to access the draft invoice from Accounting > Invoices > Pending transactions.
- Cancel will close the Create invoice page and return you to the previous screen where you accessed this page. You will get a warning message that if you leaves this page your work will not be saved.
Accessing the New View Invoice Page
The modernized View Invoice page can be access from multiple places in EZLynx. No matter which path you take, you will be taken to the new View Invoice page.
To access the View Invoice page from the applicant:
1. Navigate to a customer's Overview page.
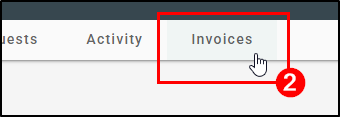
2. Then, choose the Invoices tab.
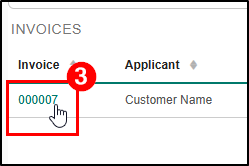
3. Under the Invoices section, click on the Invoice number. This will open the View Invoice page.
 |  |  |
To access the View Invoice page from the Accounting Invoices page:
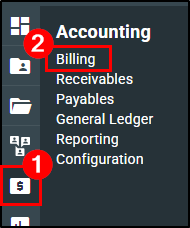
1. Hover over the Accounting icon (dollar bill) on the left navigation bar.
2. Choose Billing.
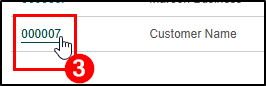
3. On the Invoices tab, click on the Invoices number. This will open the View Invoices page.
 |  |
New View Invoice Page
Now that you are on the new View Invoice's page, let's take a tour so you know where everything is.
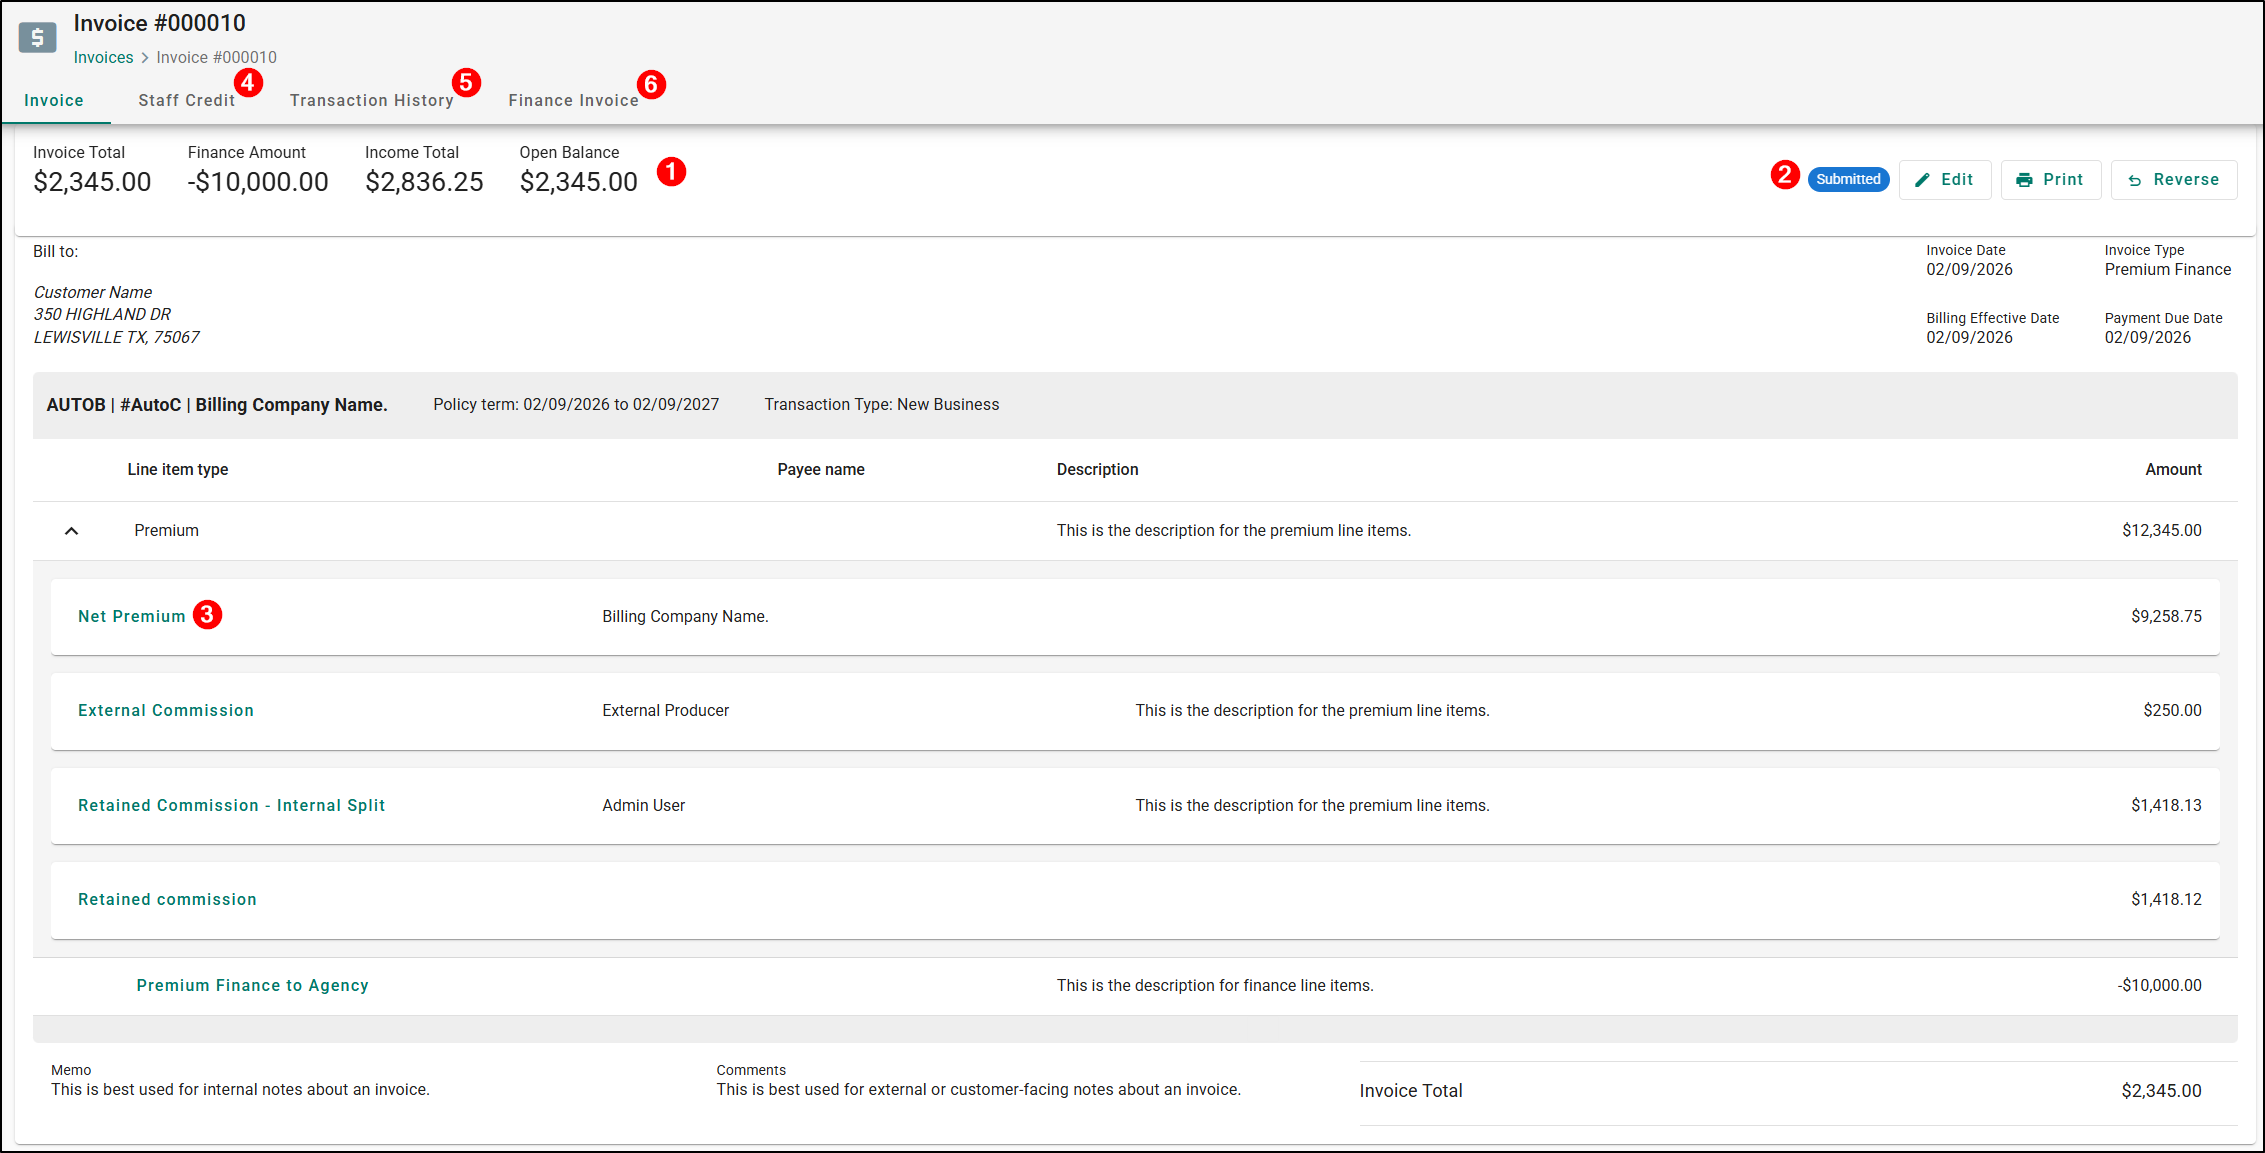
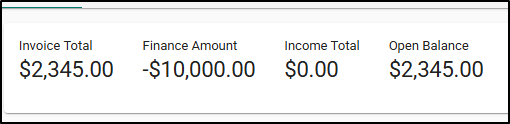
1. Just like on the Create Invoices page, there are Invoice Header Totals on the top-left of the page which include:
- Invoice total: This is a total of all line items on the invoice.
- Income total: This is a total of all Retained Commission line items on the invoice.
- Open balance: This is the amount due for the invoice.
- Finance amount: This is the amount financed on the invoice (will only display for premium finance invoices).
2. On the top-right of the page there is an Invoice header status and actions buttons depending on what status the invoice is in.
- There are two different Invoice statuses:
- Submitted means the invoice has been created but no receipt has been applied.
- Finalized is dependent on user settings in Accounting > Configuration > Branch or the invoice has a receipt applied.
- Invoices in Submitted status will also have an Edit button that will allow you to change the payment due date and the invoice memo.
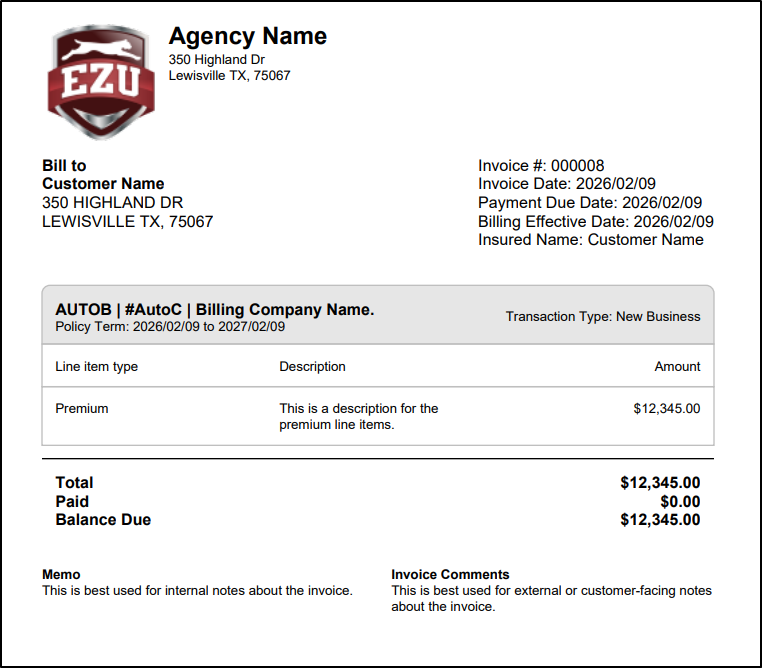
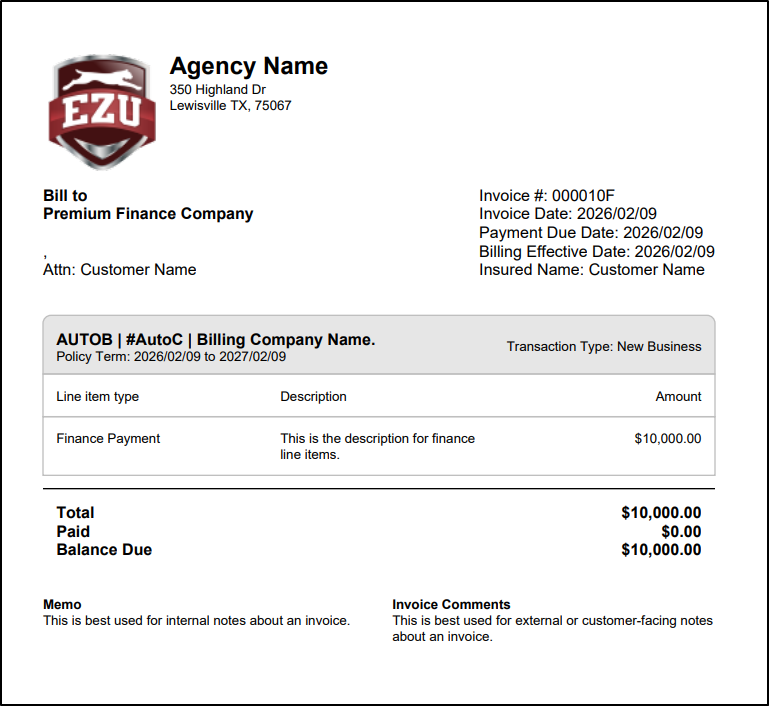
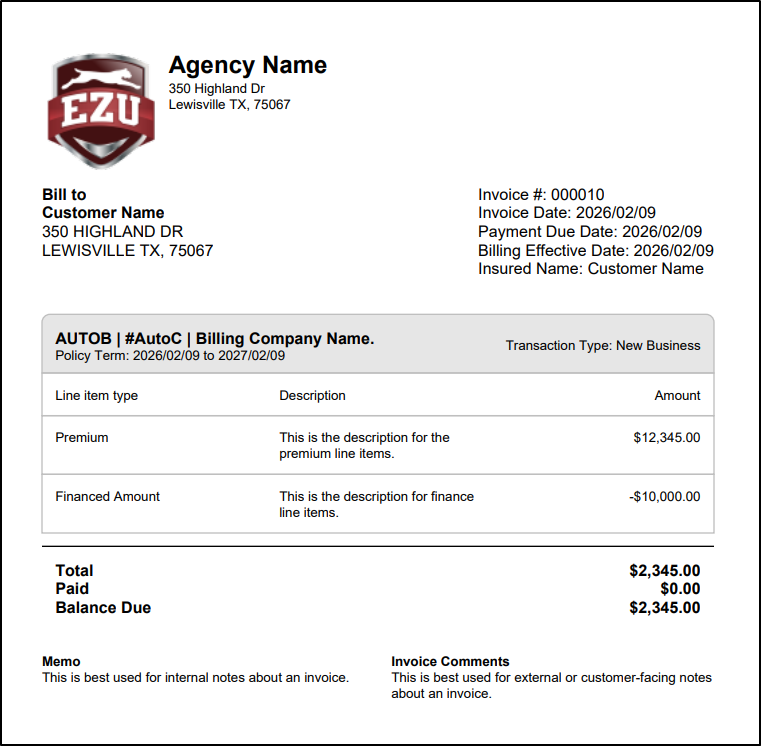
- The Print button downloads a PDF version of the invoice.
| PDF Examples | ||
| Single Invoice | Finance Invoice to Finance Company | Finance Invoice to Customer |
 |  |  |
- The Reverse button allows you to reverse the invoice per current functionality. Please note, the Reverse button is not available for financed invoices.

3. The Line item labels are click-enabled which when clicked will display detailed information in a side panel.
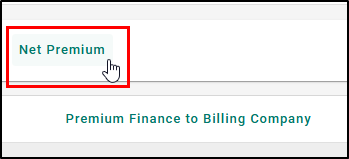 | 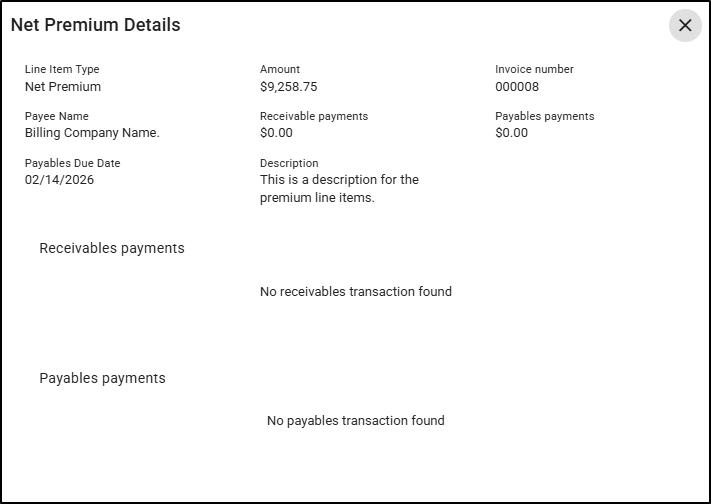 |
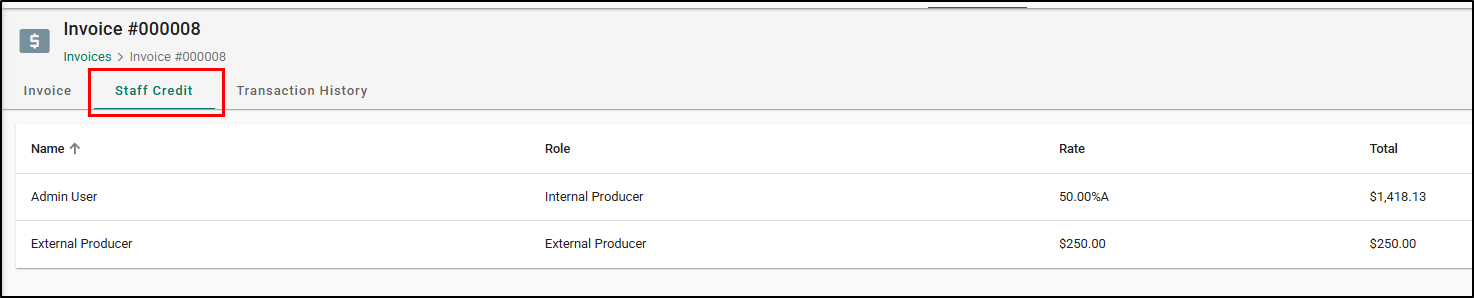
4. The Staff Credit tab will display a list of all producers, their roles, aggregated commission rate, and commission amounts.
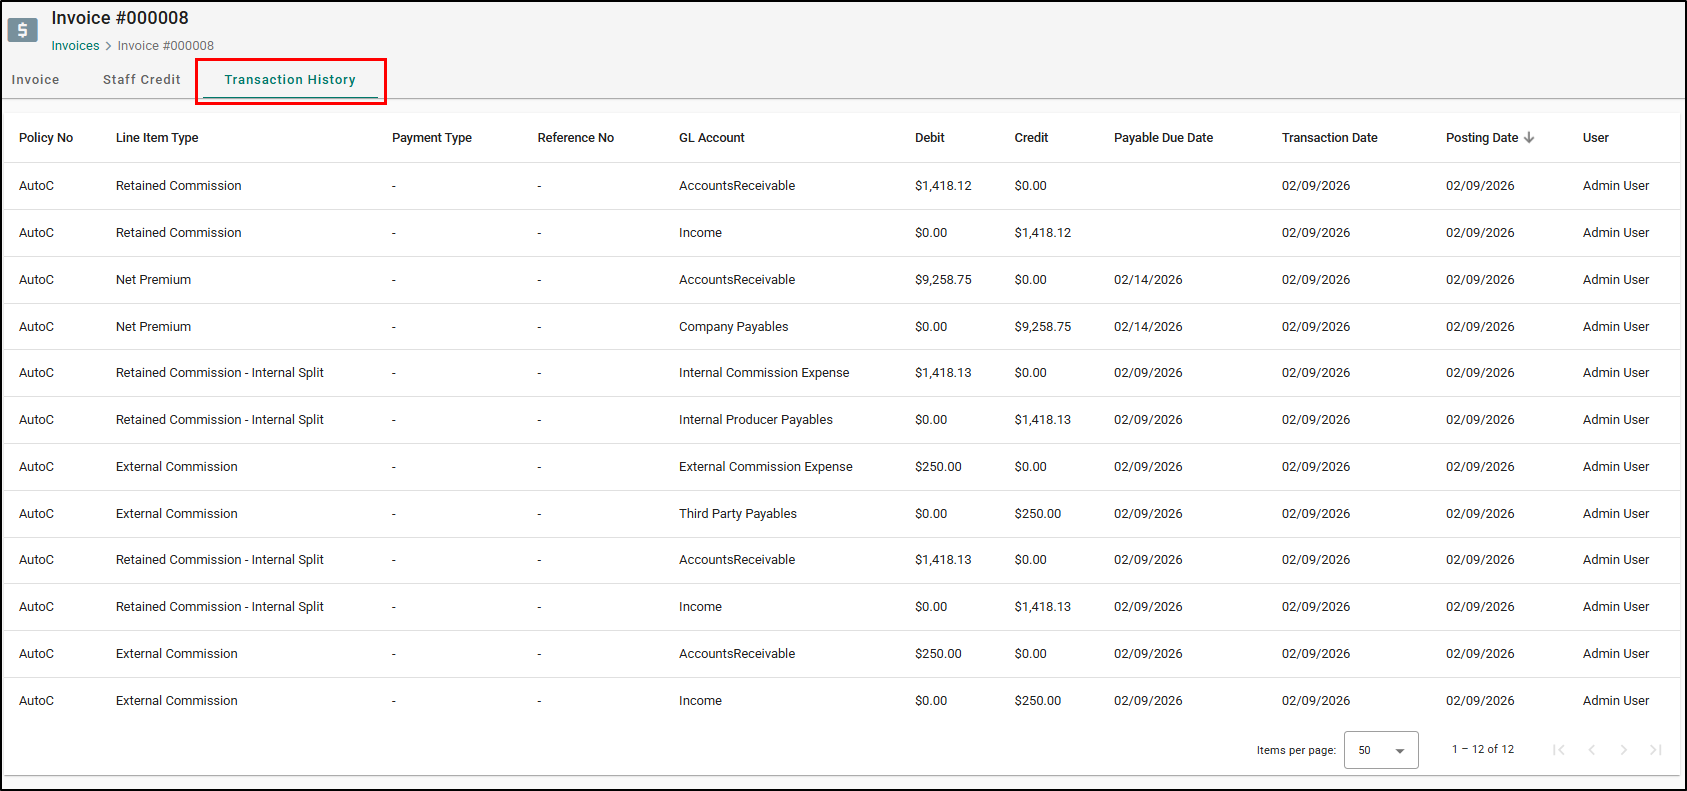
5. The Transaction History tab is a trail of all the transaction that have happened on the invoice for auditing purposes.
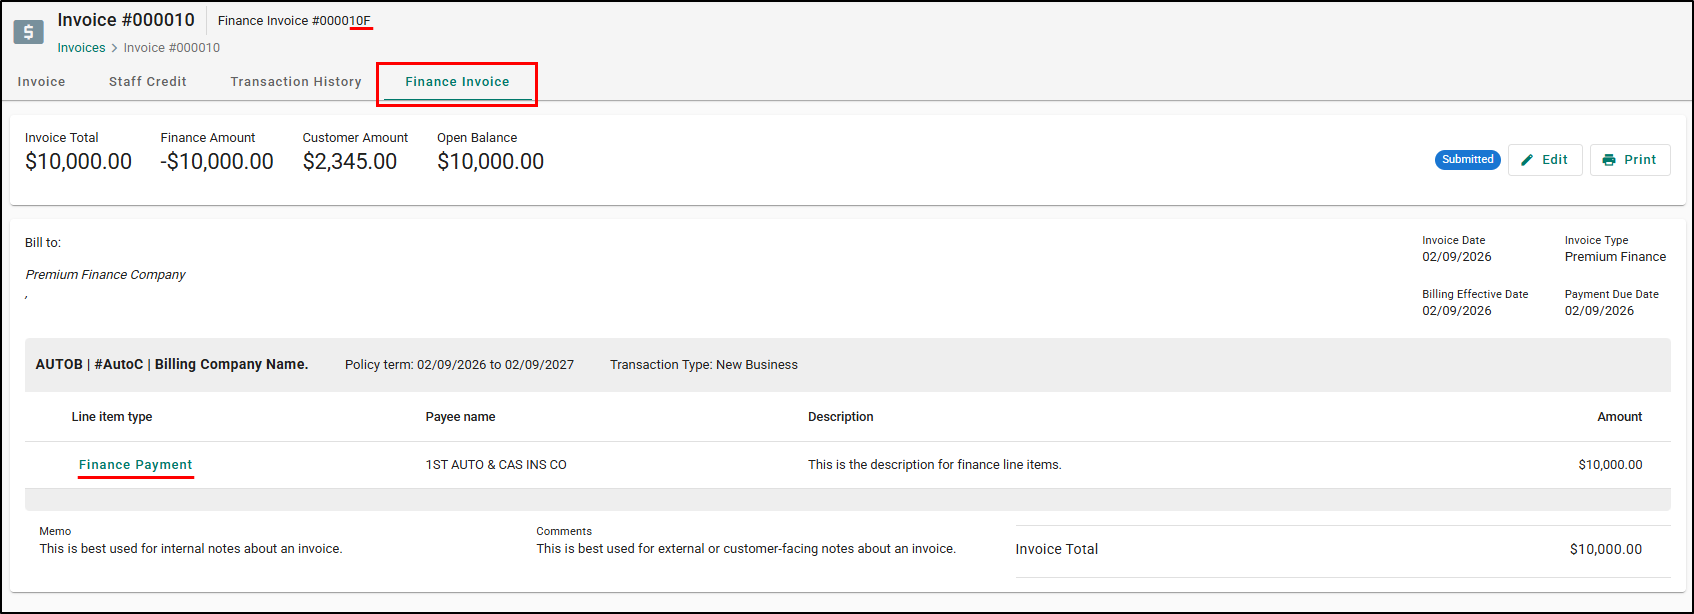
6. Premium finance invoices that are paid to the agency will also display the financed invoice under the Finance Invoice tab. From here you can see that the header at the top-left displays the unique ‘F’ invoice number and a reference to the original invoice. Just like before, the line item labels are click-enabled to display detailed information in a side panel.
We hope you are excited for this new feature and look forward to our future releases. Please let us know if this article was helpful in learning about the new feature by answering the question below. Check out our related articles on the right-side of the page to learn more about EZLynx!
Did you find it helpful? Yes No
Send feedback