Effortless eSignature Workflow
Modified on: Thu, 26 Mar, 2026 at 2:23 PM
With this release, we are pleased to announce a comprehensive modernization of the EZLynx eSignature workflow! This update introduces a flexible, four-step process designed to give you total control over their digital signing tasks.
- Streamlined Four-Step Process: A logical progression through Add Document(s), Setup Envelope, Setup Signature, and Review and Send
- Draft & Edit Functionality: Save your progress at any stage and return later to edit and send your draft envelopes—a brand-new capability for EZLynx.
TABLE OF CONTENTS | Check out our updated video to see the full workflow!
|
 | Did you know? - You can click on the images in our articles to zoom in. |
What's in it for me?
- Flexibility for Busy Agents: With the new "Save as Draft" and "Edit" features, you can pause your work to handle a phone call or a walk-in client and pick up exactly where you left off later.
- Increased Accuracy: The "Review and Send" step provides a final, comprehensive preview of all signer blocks and envelope details, ensuring documents are professional and correct before they reach the client.
How It Works
The new eSignature workflow is broken down into four clear, manageable steps. You can navigate between these steps using the "Back" and "Next" buttons, and your progress is maintained throughout.
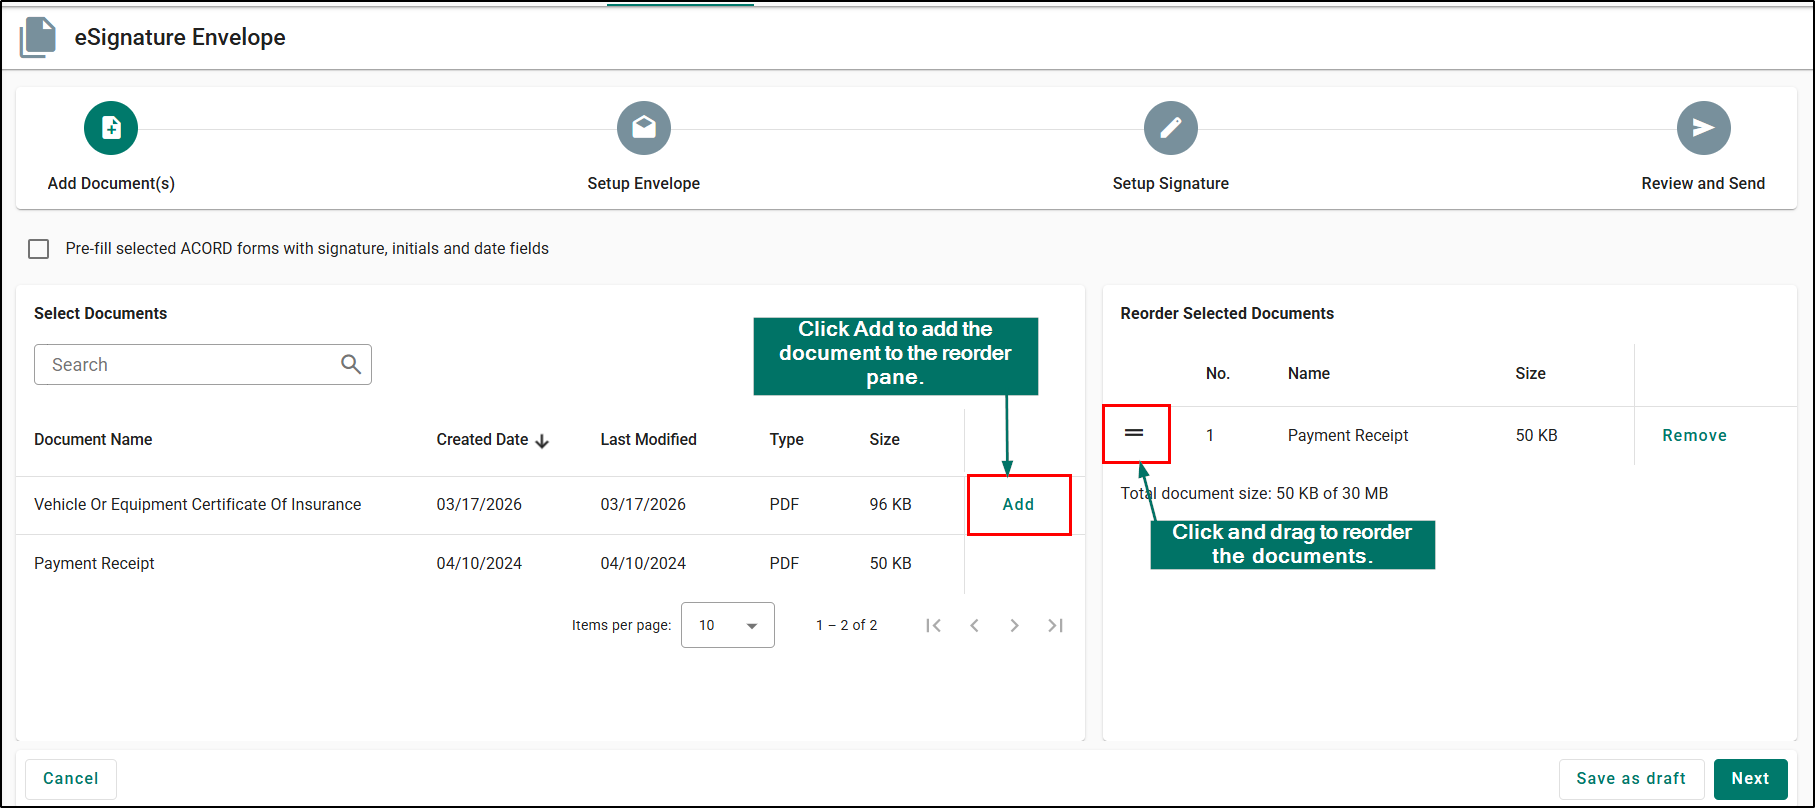
Step 1: Add Document(s)
- Select the documents you wish to include in the envelope. In this step, you can also reorder the documents to ensure they appear in the preferred sequence for the signer.
Saving and Editing Drafts
- Once you have selected at least one document, you can click Save as Draft. This saves your current progress and allows you to return to the eSignature dashboard later to Edit the draft, make further changes, and send when ready.

Step 2: Setup Envelope
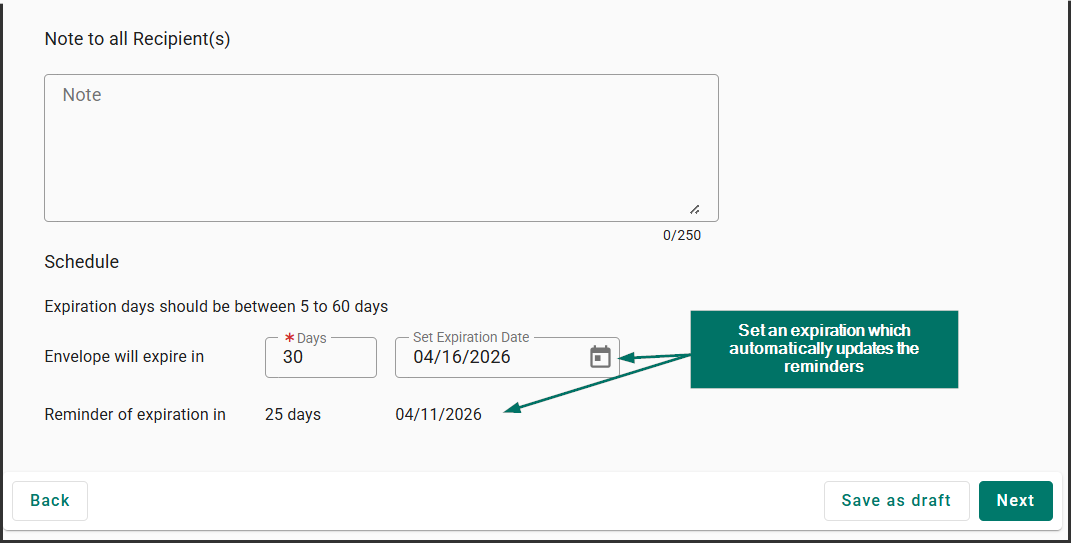
- Configure the core details of your envelope. This includes naming the envelope, selecting the "Send As" identity, and setting password requirements. You will also add, edit, and order your recipients here, as well as schedule expiration and reminder dates.
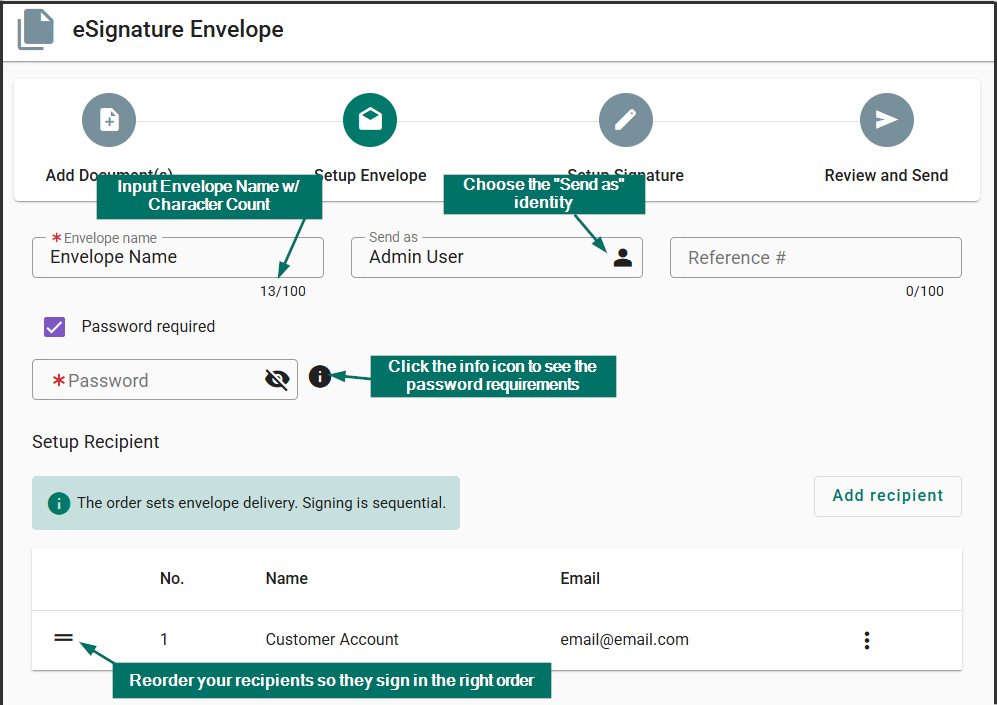
Adding Recipients
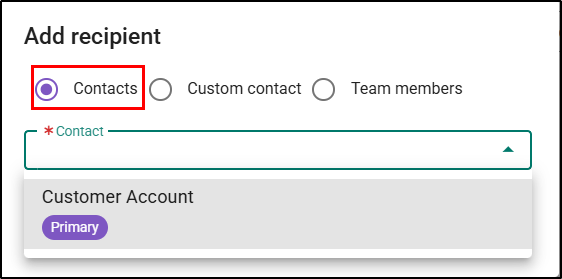
- By default, the primary contact will populate in the Setup Recipient section for both PL and CL applicants. If no primary contact is available, you will need to manually select or enter a contact using the Add Recipient button.
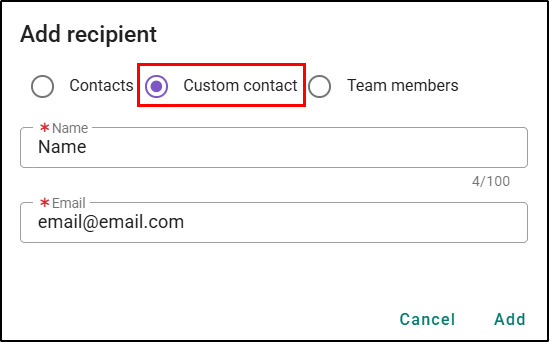
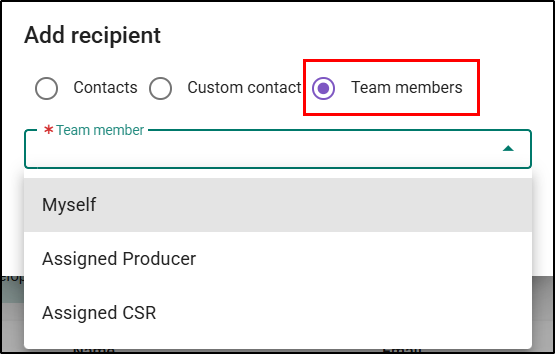
When adding a recipient, you can choose from 3 options:
- Contacts – this option will allow you to pick from existing contacts in the applicant's record. Only contacts with email addresses will appear, and if a single contact has multiple email addresses, you can select from the dropdown.
- Custom contact – this option allows you to enter a new signer’s information.
- Team member – this option has 3 selections:
- Myself – this will enter the name and email for the person completing the workflow
- Assigned Producer – this will populate the name and email for the applicant’s assigned producer.
- CSR - this will populate the name and email for the applicant’s CSR.
 |  |  |
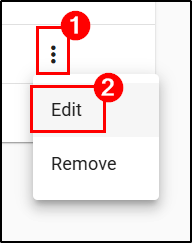
Editing Recipients
|  |
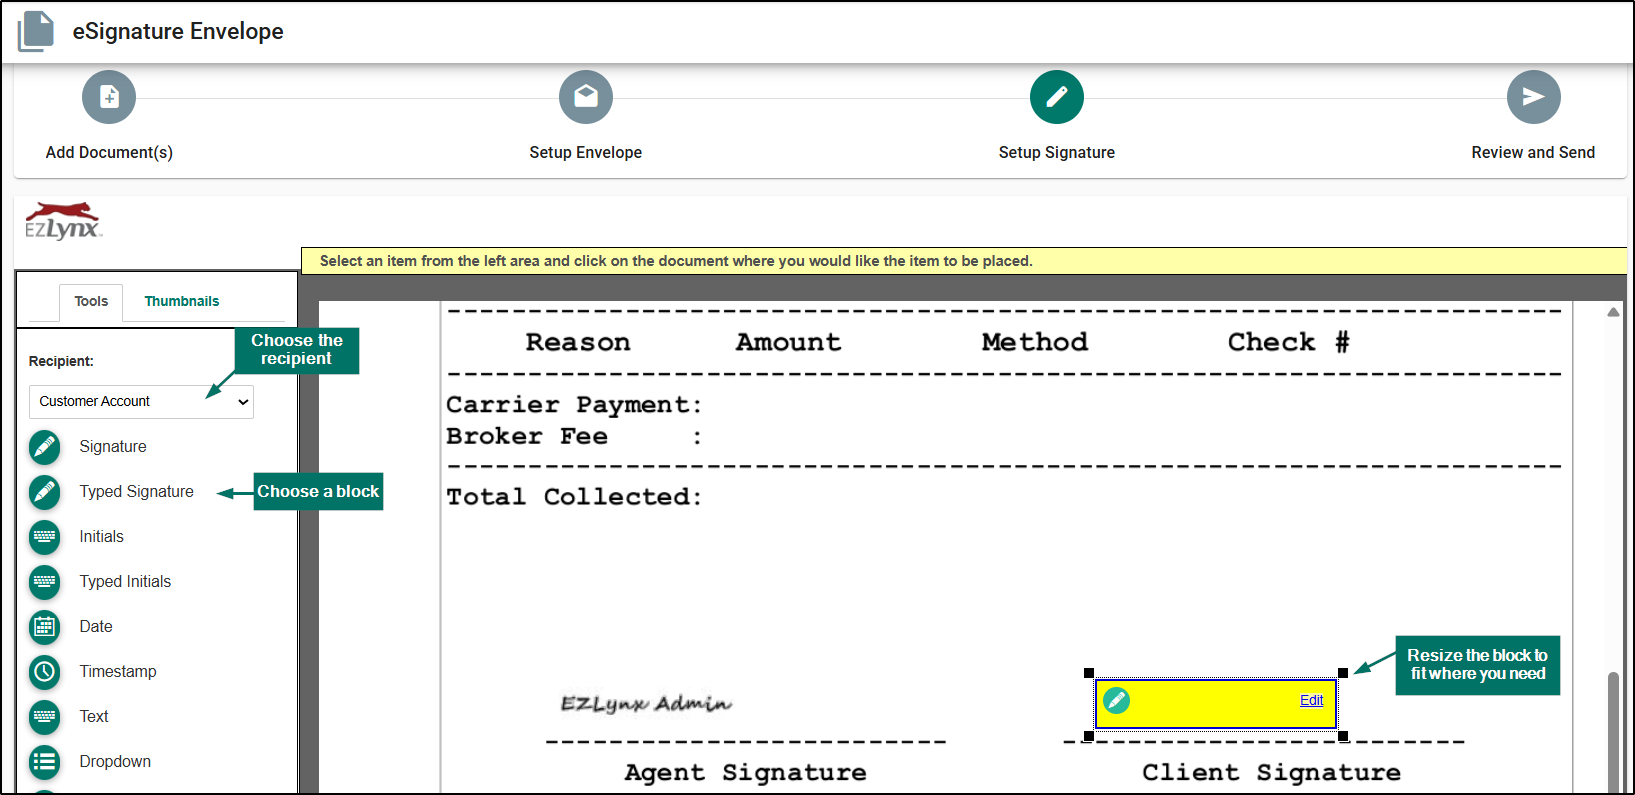
Step 3: Setup Signature
- Place signature, initial, and date blocks onto the documents for each recipient. To ensure a valid envelope, the system requires at least one signer block per recipient.
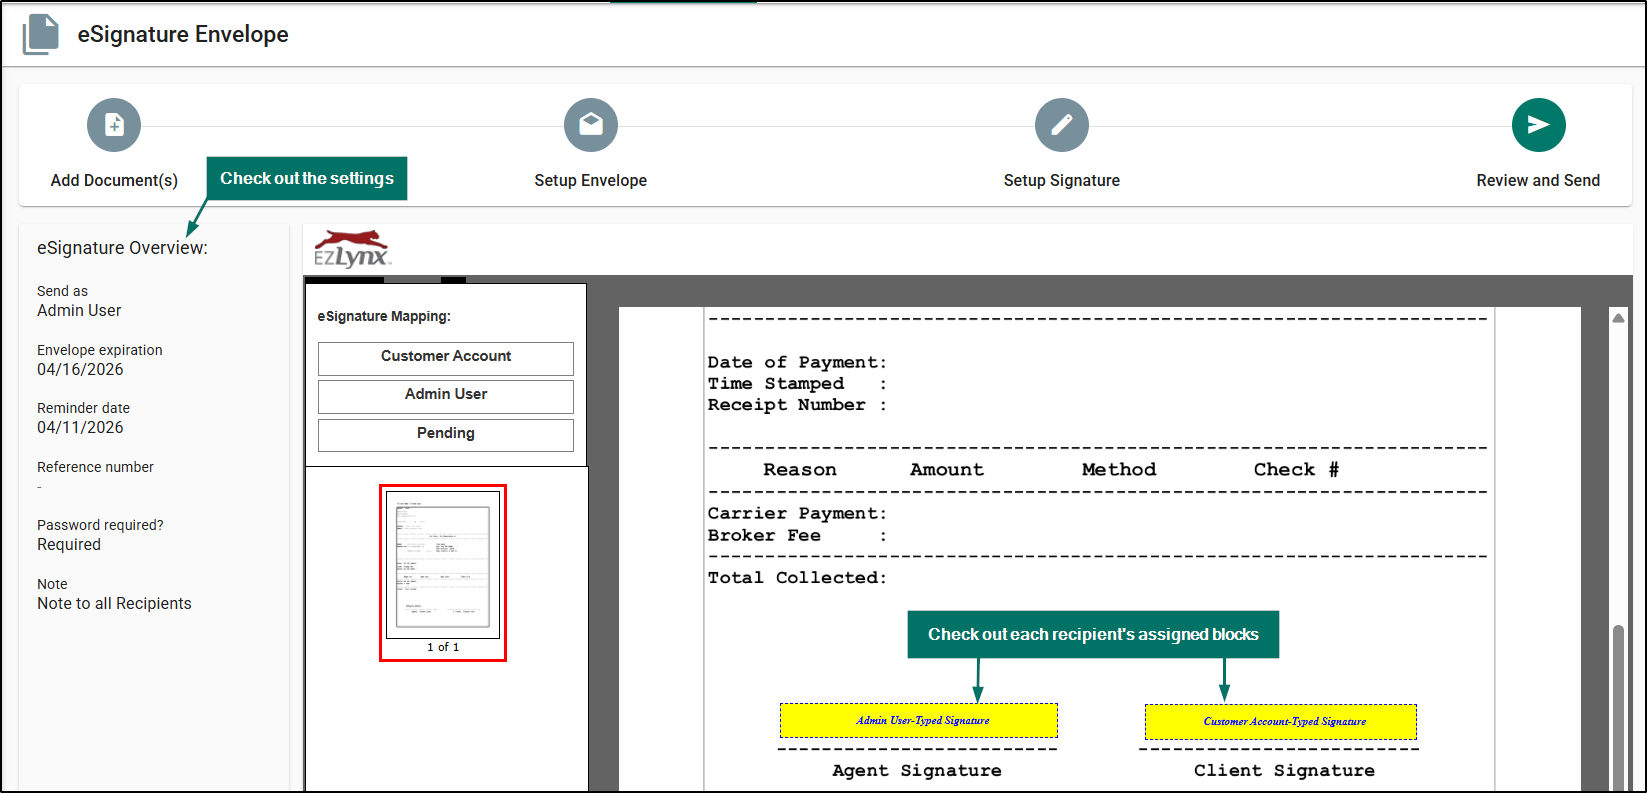
Step 4: Review and Send
- Review a summary of all envelope settings and a full preview of the document with the placed signer blocks. Once verified, click send to initiate the signing process.
Practical Applications
3 ways your agency can make the most out of this feature:
- Managing Complex Commercial Envelopes – For large applications requiring multiple documents and signers, use the "Save as Draft" feature to build the envelope over time as you receive necessary information, then use the "Edit" function to finalize it.
- Last-Minute Corrections – If you reach the "Review and Send" step and notice a missing signature block, simply navigate back to the relevant step, fix the error, and return to the final review without losing any other data.
- Secure Client Onboarding – Use the "Setup Envelope" step to add password protection and specific signing orders, ensuring that sensitive onboarding documents are handled securely and in the correct sequence by all parties.
We hope you are excited for this new feature and look forward to our future releases. Please let us know if this article was helpful in learning about the new feature by answering the question below. Check out our related articles on the right-side of the page to learn more about EZLynx!
Did you find it helpful? Yes No
Send feedback